
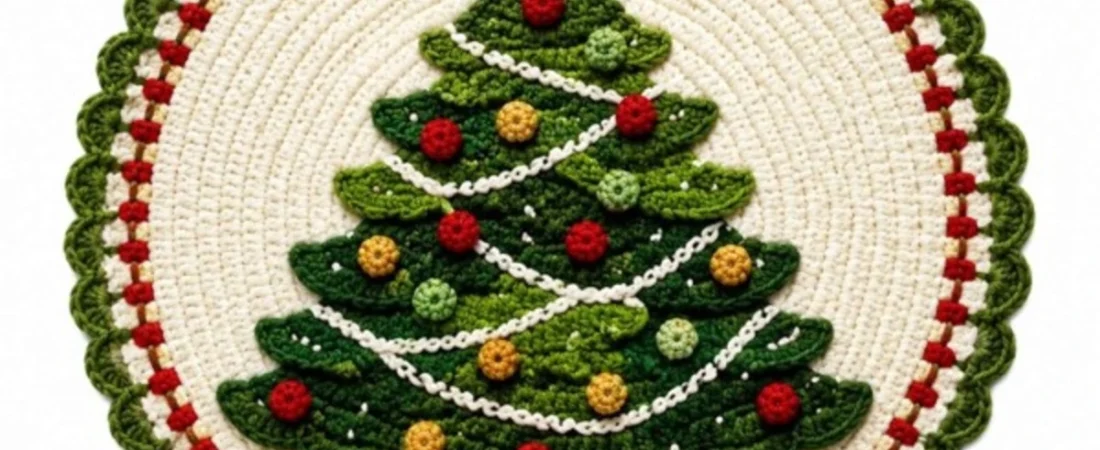
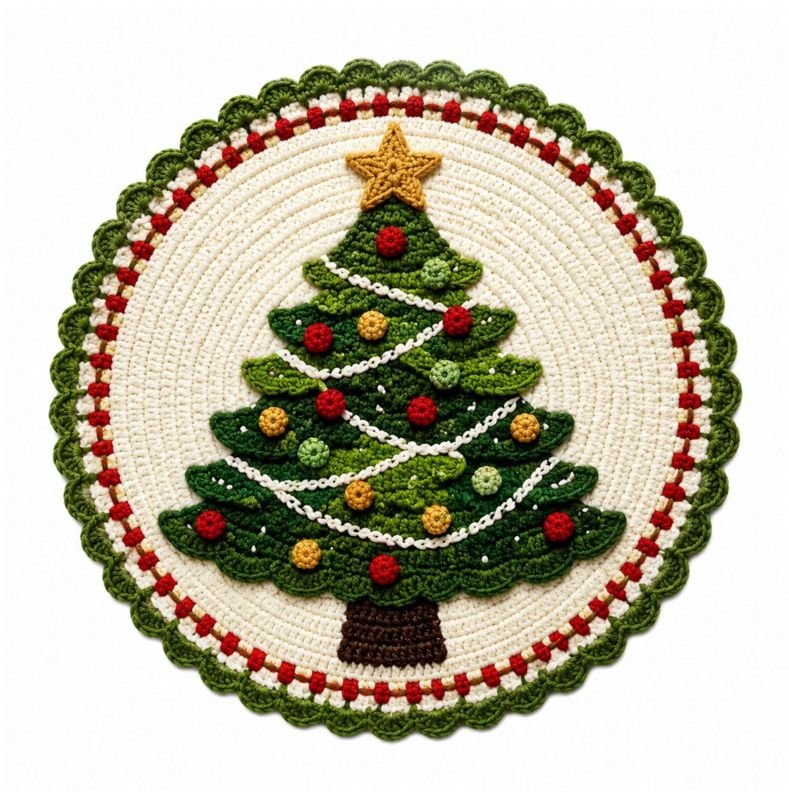
Layered holiday tree applique on a round scalloped coaster
| Skill level | US terms | Finished size |
|---|---|---|
| Intermediate | Written instructions | Approx. 9 in / 23 cm |
This pattern uses separately crocheted tree pieces, a flat circular base, surface decoration, and sewn embellishments.
1. Project Overview
This coaster is built in three stages: a flat cream circular base, a decorative border, and a layered Christmas tree applique. The tree is assembled from five overlapping branch tiers, a trunk, a star, four white garlands, and small crochet ornaments.
IMPORTANT: Work the circular base flat before attaching any applique pieces. Block the base first. The beginning chain on all joined rounds does not count as a stitch unless stated otherwise.
2. Finished Size and Gauge
- Finished diameter: approximately 9 in / 23 cm after light blocking.
- Tree applique: approximately 6.5-7 in / 16.5-18 cm wide at the lowest branch tier and approximately 7 in / 18 cm tall including star and trunk.
- Gauge for base: approximately 24 hdc x 16 rows = 4 in / 10 cm in firm, unblocked fabric.
- Gauge is more important for finished size than for stitch count. Keep the base flat and even.
GAUGE CHECK: After Round 5, the base should measure about 2.6-2.9 in / 6.5-7.5 cm across. After Round 10, it should measure about 5.3-5.8 in / 13.5-14.5 cm across.
3. Materials
| Material | Amount | Use |
|---|---|---|
| Cream/off-white DK cotton | Approx. 90-110 yd / 82-100 m | Circular base |
| Medium green DK cotton | Approx. 40-50 yd / 37-46 m | Tree tiers |
| Dark green DK cotton | Approx. 25-35 yd / 23-32 m | Tier edging + outer border |
| Red DK cotton | Approx. 15 yd / 14 m | Border berries + ornaments |
| Gold/mustard DK cotton | Approx. 12 yd / 11 m | Star + ornaments |
| Light green DK cotton | Approx. 8 yd / 7 m | Ornaments |
| Brown DK cotton | Approx. 8 yd / 7 m | Trunk |
| White DK cotton | Approx. 12 yd / 11 m | Garlands |
| Optional fine gold thread | Approx. 1 yd / 1 m | Border accent |
- 3.25 mm crochet hook, or size needed to match gauge.
- Yarn needle, scissors, stitch markers, blocking pins and rustproof surface.
4. Abbreviations – US Terms
| Abbreviation | Meaning | Abbreviation | Meaning |
|---|---|---|---|
| ch | chain | MR | magic ring |
| sl st | slip stitch | sc | single crochet |
| hdc | half double crochet | dc | double crochet |
| inc | 2 stitches in the same stitch | sk | skip |
| st(s) | stitch(es) | rep | repeat |
5. Round Coaster Base
With cream/off-white yarn and 3.25 mm hook. Work in joined rounds. Ch 1 at the beginning of each round does not count as a stitch. Join each round with a sl st to the first hdc or sc.
SMOOTHER CIRCLE: If you see visible increase lines, shift the increase position on every second round by working roughly half of the plain stitches before the first increase. Keep the same total stitch count shown below.
| Round | Instructions | Stitch count |
|---|---|---|
| R1 | MR, ch 1, 10 hdc in ring. Join. | 10 |
| R2 | Ch 1, 2 hdc in each st around. Join. | 20 |
| R3 | Ch 1, *1 hdc, inc* around 10 times. Join. | 30 |
| R4 | Ch 1, *2 hdc, inc* around 10 times. Join. | 40 |
| R5 | Ch 1, *3 hdc, inc* around 10 times. Join. | 50 |
| R6 | Ch 1, *4 hdc, inc* around 10 times. Join. | 60 |
| R7 | Ch 1, *5 hdc, inc* around 10 times. Join. | 70 |
| R8 | Ch 1, *6 hdc, inc* around 10 times. Join. | 80 |
| R9 | Ch 1, *7 hdc, inc* around 10 times. Join. | 90 |
| R10 | Ch 1, *8 hdc, inc* around 10 times. Join. | 100 |
| R11 | Ch 1, *9 hdc, inc* around 10 times. Join. | 110 |
| R12 | Ch 1, *10 hdc, inc* around 10 times. Join. | 120 |
| R13 | Ch 1, *11 hdc, inc* around 10 times. Join. | 130 |
| R14 | Ch 1, *12 hdc, inc* around 10 times. Join. | 140 |
| R15 | Ch 1, *13 hdc, inc* around 10 times. Join. | 150 |
6. Border Rounds
| Round | Instructions | Count |
|---|---|---|
| R16 – cream | Ch 1, sc in each st around. Join. | 150 sc |
| R17 – cream | Ch 1, *sc in next 4 sts, ch 1, sk next st* around 30 times. Join. | 150 positions / 30 ch-1 spaces |
| R18 – cream | Ch 1, sc in each sc and 1 sc in each ch-1 space around. Join. | 150 sc |
| R19 – dark green | *Sl st in next st, sk 1, 5 dc in next st, sk 1, sl st in next st* around. Join and fasten off. | 30 scallops |
FLATNESS CHECK: The coaster should lie flat without forcing. If it cups, try one hook size larger for the base. If it ripples, try one hook size smaller. Keep the written stitch counts unchanged for a close match to the pictured proportions.
7. Red Border Berries – Make 30
- With red yarn, make an MR. Ch 1 and work 6 hdc into the ring.
- Join with a sl st to the first hdc. Pull the ring tightly closed.
- Fasten off, leaving a 4 in / 10 cm tail. Use the tail to take one small stitch across the back of the circle and pull gently so the berry domes slightly.
- Sew one berry directly over each R17 ch-1 space, evenly around the coaster.
Gold accent: Crochet or twist a thin gold cord long enough to circle R17 without stretching (usually 165-180 chains with DK yarn). Weave/tack it around the coaster just inside the berry line, passing behind each red berry. Secure invisibly on the wrong side.
8. Tree Branch Tiers – Make 5
All five branch tiers use the same shaping method. Work in rows with medium green. For a mottled green look, substitute dark green for 2-3 rows anywhere within each tier. Ch 1 to turn; turning ch does not count as a stitch.
Tier Shaping Rule
- Foundation: ch the number shown in the table plus 1. Sc in 2nd ch from hook and across. This is Row 1.
- Rows 2 through final shaping row: ch 1, turn, 2 sc in first st, sc across to last st, 2 sc in last st. Each row increases by 2 stitches.
- Do not fasten off after the final shaping row. Continue directly to the lower scallop edge.
| Piece | Row 1 | Total rows | Final row | Lower edge |
|---|---|---|---|---|
| Tier 1 – smallest | 3 sc | 7 rows | 15 sc | 5 scallops |
| Tier 2 | 5 sc | 9 rows | 21 sc | 7 scallops |
| Tier 3 | 7 sc | 11 rows | 27 sc | 9 scallops |
| Tier 4 | 9 sc | 13 rows | 33 sc | 11 scallops |
| Tier 5 – largest | 11 sc | 15 rows | 39 sc | 13 scallops |
Lower Scallop Edge – Each Tier
After the final shaping row, ch 1 and turn. Across the entire final row work: *sl st in next st, 3 hdc in next st, sl st in next st*. Repeat to the end. The final-row stitch counts are all multiples of 3, so the scallops fit exactly.
Fasten off. With dark green yarn, join at one top corner and work sc evenly down the sloping side, placing 2 sc in the bottom corner. Fasten off before the scalloped lower edge. Repeat on the opposite sloping side. This creates the darker outline seen around each branch tier.
COUNT CHECK: Tier 1 ends with 15 sc, Tier 2 with 21 sc, Tier 3 with 27 sc, Tier 4 with 33 sc, and Tier 5 with 39 sc before the scallop edging.
9. Trunk
- With brown yarn, ch 9.
- Row 1: sc in 2nd ch from hook and across – 8 sc.
- Rows 2-7: ch 1, turn, sc across – 8 sc.
- Fasten off, leaving a long tail for sewing. Lightly block into a small rectangle.
10. Five-Point Star
With gold/mustard yarn:
- Make an MR. Ch 1, work 10 sc into the ring, and join with a sl st to the first sc. Pull ring closed.
- Make 5 points as follows, using 2 base stitches per point: *sl st in next sc, ch 6, sl st in 2nd ch from hook, sc in next ch, hdc in next ch, dc in next ch, tr in last ch, sl st in next base sc*. Repeat from * to * 5 times.
- Fasten off, weave in the short tail, and leave one sewing tail. Lightly steam or wet block the points flat.
11. Small Crochet Ornaments – Make 13
Make 6 red, 4 gold/mustard, and 3 light green ornaments.
- With chosen color, make an MR. Ch 1 and work 7 hdc into the ring.
- Join with a sl st to the first hdc and pull the ring tightly closed.
- Fasten off with a 5 in / 13 cm sewing tail. To make the ornament slightly raised, pass the tail across the back once and pull gently before knotting.
12. White Garlands – Make 4
Use white yarn. For each cord, chain the length shown, then sl st back through every chain to create a narrow flexible cord. Fasten off with long tails for sewing.
| Garland | Starting chain | Approx. use |
|---|---|---|
| 1 – upper | 18 ch | Across Tier 2 |
| 2 | 26 ch | Across Tier 3 |
| 3 | 34 ch | Across Tier 4 |
| 4 – lower | 42 ch | Across Tier 5 |
FIT TIP: Do not stretch the garlands while sewing. Pin them into gentle curves first. The lowest point of each curve should sit near the center of the tier, with the ends slightly higher.
13. Optional White Snow Dots
For the tiny white speckles visible between ornaments, make 10-16 small straight stitches with white yarn or add tiny surface knots after assembly. Keep them irregular and sparse.
14. Assembly Order
Block the cream coaster base flat and let it dry completely. Use matching yarn and small invisible whip stitches. Keep the outer border free and flexible.
- Sew the trunk first. Center it on the vertical axis of the coaster. Position the bottom of the trunk approximately 3/4 in / 2 cm inside the green scalloped border.
- Place Tier 5 over the upper part of the trunk. Sew along the top edge and sloping sides only. Leave the lower scalloped edge free for dimension.
- Center Tier 4 above Tier 5 so it overlaps Tier 5 by about 1 1/4 in / 3 cm. Sew the top and sides only.
- Repeat with Tier 3, Tier 2, and Tier 1, keeping the layers centered and overlapping each lower tier by approximately 1-1 1/4 in / 2.5-3 cm.
- Pin and sew the four white garlands in soft downward curves across Tiers 2-5.
- Sew the 13 ornaments in the placement arrangement below, or distribute them evenly while keeping the center line balanced.
- Sew the gold star above Tier 1. The bottom two star points may overlap the top of Tier 1 slightly.
- Add optional white snow dots. Weave in all remaining ends on the wrong side.
Suggested Ornament Placement
| Tier | Placement | Colors |
|---|---|---|
| Tier 1 | 1 centered | Red |
| Tier 2 | 3 spaced across | Red – Gold – Red |
| Tier 3 | 3 spaced across | Gold – Red – Light green |
| Tier 4 | 3 spaced across | Red – Gold – Light green |
| Tier 5 | 3 spaced across | Gold – Red – Light green |
Assembly Placement Guide
Center all pieces on one vertical line. Diagram is not to stitch scale.
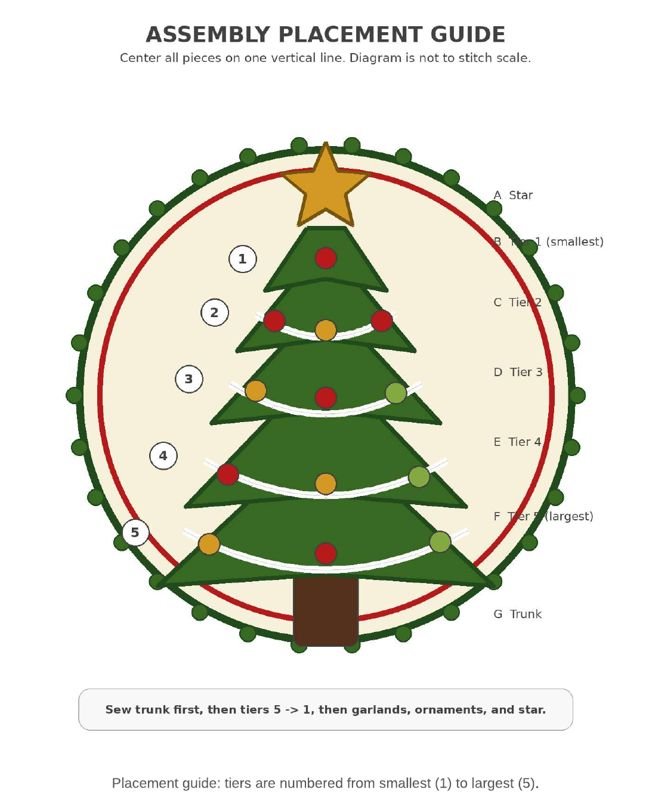
Order: Sew trunk first, then tiers 5 → 1, then garlands, ornaments, and star.
15. Final Shaping and Finishing
- Lay the completed coaster face up on a blocking surface and gently smooth the circle and branch tiers into shape.
- Pin only the outer green scallops and the tips of the tree tiers. Do not flatten the raised ornaments.
- Lightly mist with water or wet-block according to the yarn label. Allow to dry fully before unpinning.
- Trim any visible tails on the wrong side only after checking that every sewn piece is secure.
16. Stitch-Count Audit
| Base round | Count | Base round | Count |
|---|---|---|---|
| R1 | 10 | R9 | 90 |
| R2 | 20 | R10 | 100 |
| R3 | 30 | R11 | 110 |
| R4 | 40 | R12 | 120 |
| R5 | 50 | R13 | 130 |
| R6 | 60 | R14 | 140 |
| R7 | 70 | R15 | 150 |
| R8 | 80 |
- R16 = 150 sc; R17 = 150 positions with 30 ch-1 spaces; R18 = 150 sc; R19 = 30 green scallops.
- Tree final shaping rows = 15, 21, 27, 33, and 39 sc from Tier 1 through Tier 5.
- Tree lower scallops = 5, 7, 9, 11, and 13 from Tier 1 through Tier 5.
- Border berries = 30. Tree ornaments = 13. Garlands = 4. Star points = 5.
17. Troubleshooting
| Issue | Fix |
|---|---|
| Base cups upward | Tension is too tight for the written increase rate. Try a hook 0.25-0.5 mm larger for the base. |
| Base ruffles | Tension is too loose. Try a hook 0.25-0.5 mm smaller for the base. |
| Tree looks too narrow | Block each tier wider before sewing; do not stretch vertically. |
| Layers look bulky | Sew only the top and sloping sides of each tier; leave the scalloped lower edge unattached. |
| Garland pulls tiers inward | Remove a few stitches, repin without tension, and sew the cord in a relaxed curve. |
| Border berries twist | Take one tiny anchoring stitch through the berry center as well as the outer edge. |
18. Care
Hand wash gently in cool water with mild soap. Do not wring. Roll in a towel to remove excess water, reshape flat, and air dry. If using the piece under hot dishes, use 100% cotton yarn and avoid acrylic or metallic components that are not heat-safe.
FINAL CHECK: The finished piece should lie flat, the outer scallops should be evenly spaced, all five tree tiers should be centered, and no sewing tails should be visible from the front.