
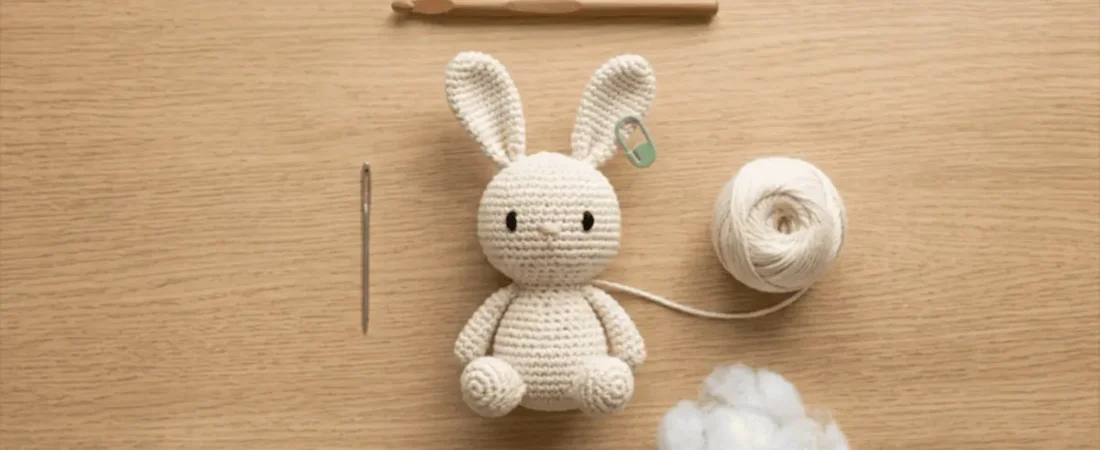
To crochet a stuffed animal, work single crochet in a continuous spiral, starting with a magic ring and increasing each round to shape the pieces. Stuff each piece firmly, sew the pieces together and add a face. For a first project, choose a simple bunny, bear or whale with few pieces.
Those tiny crocheted animals you see everywhere are called amigurumi. They look complicated, but they use a few basic skills, and once you know them, you can make almost any animal.
This guide shows how amigurumi works, how to crochet a stuffed animal from start to finish, which animal is easiest to begin with and how to keep your toys safe.
Key takeaways
- Amigurumi is worked in a spiral with single crochet.
- Use a hook smaller than the yarn label suggests, so the stuffing doesn’t show.
- Read the whole pattern first, then mark and count every round.
- Pick a simple first animal: a round body, few pieces and little detail.
- For babies and toddlers, embroider the face and keep the inside of the toy plain.
What Is Amigurumi?
Short answer: Amigurumi is the Japanese art of crocheting or knitting small stuffed creatures. The word combines “ami” (crocheted or knitted) and “nuigurumi” (stuffed doll).
Most amigurumi is crocheted in single crochet. That makes a tight, sturdy fabric that holds stuffing without showing through.
Why is amigurumi worked in a spiral?
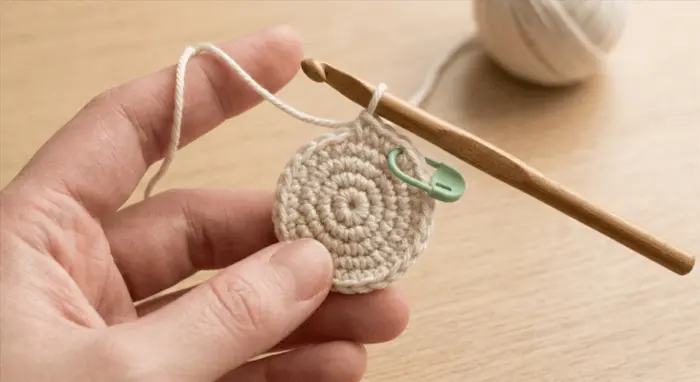
Joining each round with a slip stitch makes a visible vertical line, sometimes called “striping.” Working in a continuous spiral avoids it, so the toy looks smooth and seamless. That is why most patterns tell you not to join, and to use a stitch marker instead.
How to Make Amigurumi: The Basics
What you need
| Item | What to choose |
|---|---|
| Yarn | Smooth cotton or acrylic, in a light color to start |
| Hook | A size smaller than the yarn label suggests |
| Stuffing | Polyester fiberfill |
| Yarn needle | Blunt tip, for sewing and weaving in ends |
| Stitch markers | One for the start of each round |
| Eyes | Embroidery thread (safest) or safety eyes for older children |
| Pins and scissors | Pins help place limbs before sewing |
The skills to learn first
- Magic ring. The adjustable loop that starts most pieces. See our magic ring guide. If it frustrates you, chain 2 and work 6 single crochet into the second chain from the hook instead.
- Single crochet. The workhorse stitch of amigurumi.
- Increasing. Work 2 single crochet in one stitch to widen a shape. See how to increase in a crochet circle.
- Invisible decrease. Work two stitches together through their front loops only, so the shaping disappears.
- Fastening off. Cut the yarn, leaving a long tail for sewing or closing.
The classic starting numbers
| Round | Stitches |
|---|---|
| 1 | 6 single crochet in a magic ring |
| 2 | Increase in every stitch (12) |
| 3 | 1 single crochet, 1 increase around (18) |
Count after every increase round, and use a stitch marker to mark where each round starts.
The hook size rule
Use a hook 1 to 2 mm smaller than the yarn label suggests. A tighter fabric stops the stuffing showing through. For worsted weight yarn, 3.5 mm is a popular choice. If you can see light through your fabric, go smaller. Not sure which size matches your yarn? Use our hook size converter to switch between mm, US and UK sizes.
Read the pattern all the way through first
Patterns aren’t always written in the order you should crochet them. For example, a bear pattern may tell you to add the snout partway through the head, before you finish it. Read the whole pattern before you start, so you know when each piece is needed. If a pattern uses UK terms, our US/UK crochet terms converter shows the matching US stitches.
How to Crochet Stuffed Animals, From Pieces to Finished Toy
Short answer: Make each piece (head, body, limbs, ears and tail), stuff them, sew them together and add the face last.
Step 1: Choose a simple pattern
Look for a round shape, few pieces and a clear list of yarn, hook size and finished size. Our free classic sitting teddy bear pattern is a beginner-friendly place to begin. Our crochet project planner helps you keep track of your yarn, hook and progress.
Step 2: Crochet the body and head
Start with the magic ring and increase until you reach the widest round. Work even rounds for the middle, then decrease to close the shape. Mark and count each round.
Step 3: Crochet the limbs, ears and tail
These are small tubes or flat circles. Make matching pieces one after another, such as both ears, so they come out the same size.
Step 4: Stuff the pieces
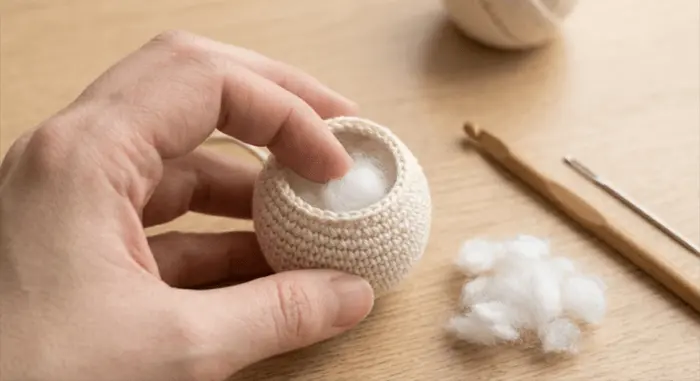
Add stuffing in small pieces and push it into the corners. Stuff until the piece is firm but not stretched. Overstuffing can pull the stitches apart and make the toy lose its shape. Leave flat parts like ears unstuffed unless the pattern says otherwise.
Step 5: Sew the pieces together
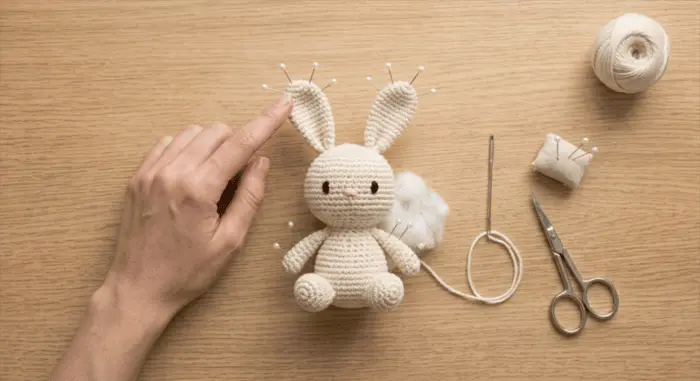
- Pin the pieces in place first.
- Check from the front and the side that they’re symmetrical.
- Sew with a yarn needle using small, tight stitches.
- Weave in the ends inside the toy.
Step 6: Add the face
Place the eyes and nose with pins first, then check the look from a distance. For babies and toddlers, embroider the face (see the safety section below). If you use safety eyes, fit them before stuffing, because you can’t attach them afterwards.
How to Make an Amigurumi Animal Bigger or Smaller
You don’t need a new pattern to change the size.
| To get… | Do this |
|---|---|
| A bigger animal | Use thicker yarn with a larger hook, or a pattern with more increase rounds |
| A smaller animal | Use thinner yarn with a smaller hook |
| A faster project | Use bulky yarn and a smaller version of the pattern |
The same pattern in baby yarn and worsted weight yarn gives two different sizes. Remember to match the hook to the yarn, and keep the fabric tight. Before resizing a whole animal, check your gauge with our gauge calculator so the new size comes out as planned.
What Is the Easiest Animal to Crochet?
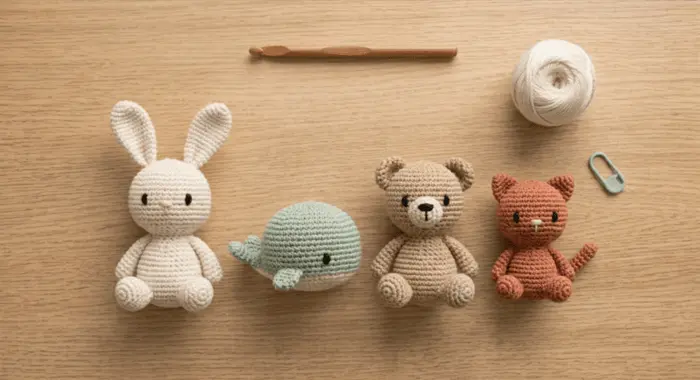
Short answer: There’s no single easiest animal. The easiest ones have a round body, few pieces, little sewing and no tiny details. A small bunny, a whale or a simple teddy bear are the most common beginner picks.
What makes an animal easy?
| Easy | Harder |
|---|---|
| Round, simple body | Tiny details and facial features |
| Few pieces (two to five) | Many pieces and lots of sewing |
| One or two colors | Many color changes |
| No-sew or low-sew | Long, thin limbs or tails |
| Standard stitches only | Surface crochet, wire or special techniques |
Beginner-friendly animals
| Animal | Why it’s easy | Watch for |
|---|---|---|
| Simple bunny | Basic shapes and minimal shaping | Sewing the ears on evenly |
| Whale or fish | Smooth round body and little assembly | Shaping the tail |
| Teddy bear | Simple pieces and a classic design | Sewing the limbs symmetrically |
| Small cat | Few pieces, like a body and a tail | Placing the ears |
| Mini hippo or frog | Small and quick to finish | Tiny details |
Looking for a first pattern? Start with our teddy bear pattern, then try the orange tabby cat once you’re comfortable. You’ll find more in our free amigurumi patterns.
How to Choose Yarn and Hook for Amigurumi Animals
| Yarn type | Pros | Watch for |
|---|---|---|
| Cotton | Neat stitch definition, little stretch | Can be harder on the hands |
| Acrylic | Soft, affordable, easy to find | Can feel stretchy |
| Fuzzy or chenille | Cuddly look | Hard to see stitches, so avoid it for a first project |
For a small first project, one small ball of about 25 g is enough. See our guide to the best yarn for crochet projects for more. To estimate how much you need for a bigger animal, try our yarn calculator.
How to Read an Amigurumi Pattern
| Abbreviation | Meaning |
|---|---|
| MR | Magic ring |
| sc | Single crochet |
| inc | Increase (2 sc in one stitch) |
| dec or inv dec | Decrease or invisible decrease |
| sl st | Slip stitch |
| FO | Fasten off |
| (18) | The stitch count at the end of the round |
A line like “Round 3: sc, inc x6 (18)” means: repeat single crochet then increase six times, and you should end with 18 stitches. For more help, see how to read crochet patterns. Stuck on a line? Paste it into our crochet pattern decoder, or look up any short form in the crochet abbreviations glossary.
Common Mistakes and Fixes
| Problem | Why it happens | Fix |
|---|---|---|
| Stuffing shows through | Stitches are too loose | Use a smaller hook |
| Lumpy toy | Stuffing added in big pieces | Add small amounts and shape as you go |
| Stitches stretched | Overstuffed | Remove some stuffing |
| Wrong stitch count | You lost track of the round | Use a stitch marker and count each round |
| Visible hole at the center | The magic ring wasn’t pulled tight | Pull the tail firmly and secure it |
| Crooked head or limbs | Pieces weren’t pinned | Pin first and check from several sides |
| Visible stripe in the fabric | Rounds were joined | Work in a continuous spiral |
Safety Tips for Crocheted Toys
Guides disagree about safety eyes, so here is the cautious approach.
| Age | Safest approach |
|---|---|
| Under 1 | Make features from yarn, and use soft, chew-safe materials |
| Under 3 | No small parts. Embroider the face, and skip buttons and beads |
| Under 8 | No wires or sharp objects inside the stuffing |
| Any age | Sew every piece on firmly and use only proper toy stuffing |
- Safety eyes: some guides use locking safety eyes for children under 3, while many manufacturers and designers say they’re not suitable for that age. Embroidery is the safest choice.
- Weights: avoid loose beads, pellets or bolts inside toys for young children.
- If you sell or give toys to children, check the toy safety rules in your country.
Frequently Asked Questions
How do you crochet stuffed animals?
Crochet each piece in a spiral of single crochet, stuff the pieces, sew them together and add a face. Start with a simple pattern.
How do you make amigurumi?
Begin with a magic ring, work single crochet in a spiral, increase to shape and decrease to close. Stuff and sew the pieces.
How do you crochet amigurumi animals as a beginner?
Pick an animal with a round body and few pieces, use a smaller hook than normal and count your stitches every round.
What is the easiest animal to crochet?
There isn’t one, but a small bunny, a whale or a simple teddy bear are common beginner picks.
What yarn is best for amigurumi?
Smooth cotton or acrylic in a light color. Avoid fuzzy yarn at first.
What size hook should I use for amigurumi?
Use a hook 1 to 2 mm smaller than the yarn label suggests. For worsted weight, 3.5 mm is a popular choice. Compare sizes with our hook size converter.
Why is amigurumi worked in a spiral?
Joining rounds makes a visible line. A spiral gives a smooth, seamless finish.
Are crocheted stuffed animals safe for babies?
They can be if you embroider the face, avoid small parts and use only toy stuffing. Check the rules in your country.
How much stuffing do I need?
Enough to make each piece firm but not stretched. Add it in small pieces.
Can I make an amigurumi bigger or smaller?
Yes. Change the yarn weight and hook size, or add or remove increase rounds.
Final Thoughts
Amigurumi is one of the most rewarding ways to learn crochet. Start with a small ball to practice the magic ring and increases. Then make a simple animal, stuff it firmly and embroider the face.
Ready to begin? Try our classic sitting teddy bear pattern. Then browse all our free crochet calculators and tools to plan each project.
Hook and yarn suggestions are general guidance. Always follow your pattern’s notes.