
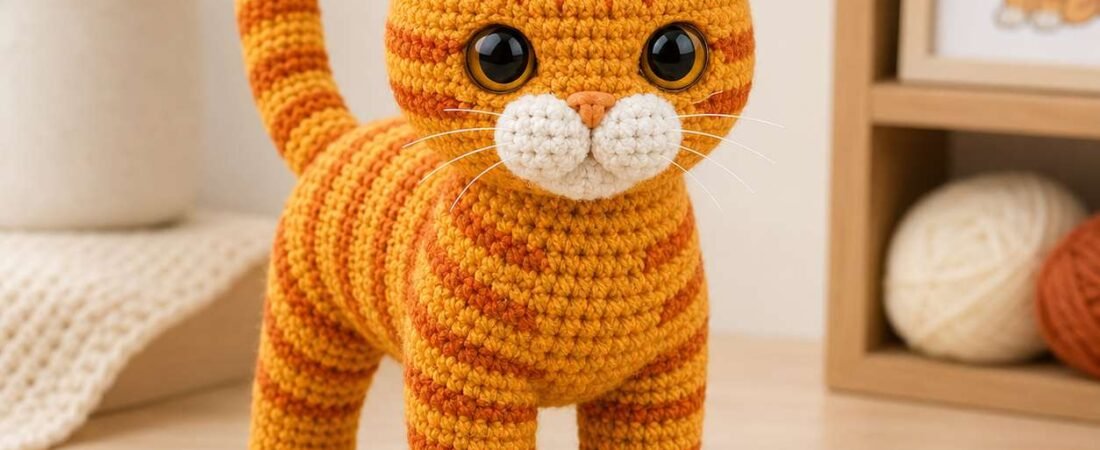
This orange tabby cat amigurumi is a free crochet pattern for a standing, life-like kitty with white paws, a white muzzle, amber eyes and hand-embroidered tabby stripes. It is worked in continuous spiral rounds with DK yarn and a 3 mm hook, and finishes at about 8.25 in / 21 cm tall.
The pattern is written in US crochet terms with round-by-round stitch counts, exact placement measurements and a step-by-step assembly. If you enjoyed our Crochet Ghost Witch or Amigurumi Winged Heart, browse more free amigurumi patterns or the full free crochet patterns collection after this one.
Free Crochet Tools for This Pattern
Use our free calculators to check your gauge, estimate how much DK yarn you need for the cat, convert the 3 mm hook to your local size and decode any abbreviation in this tabby cat pattern.
1. About This Pattern
This cat uses amigurumi shaping, an oval horizontal body, standing leg assembly, triangular ears, white paw color changes, white cheek-muzzle appliqués, surface-crochet tabby stripes and embroidered facial details. New to amigurumi? Start with how to crochet for absolute beginners and 6 basic crochet stitches first.
| Project | Detail |
|---|---|
| Skill level | Advanced intermediate |
| Terms | US crochet terms (see how to read crochet patterns) |
| Finished height | 8.25 in / 21 cm, paw to ear tip |
| Yarn weight | DK / light worsted |
| Hook | 3 mm |
| Safety | For children under 3 years, embroider the eyes instead of using safety eyes |
2. Finished Size & Gauge
| Area | Measurement |
|---|---|
| Finished height from paw to ear tip | 8.25 in / 21 cm |
| Body length from chest to rump | 5.75 in / 14.5 cm |
| Body height | 3.25 in / 8.25 cm |
| Head width | 3.75 in / 9.5 cm |
| Head height | 3.5 in / 9 cm |
| Front leg length | 2.75 in / 7 cm |
| Back leg length | 2.5 in / 6.5 cm |
| Paw diameter | 1 in / 2.5 cm |
| Tail length | 5.25 in / 13.5 cm |
| Ear height | 1.5 in / 3.8 cm |
| White muzzle width | 2 in / 5 cm |
| Gauge (sc spiral) | 22 sts x 24 rnds = 4 in / 10 cm |
| Finished fabric | Firm with no stuffing gaps |
3. Materials
| Material | Amount |
|---|---|
| DK / light worsted yarn, golden orange (main color) | 80 g |
| DK / light worsted yarn, dark orange / rust (stripes) | 25 g |
| DK / light worsted yarn, white | 20 g |
| DK / light worsted yarn, pale peach (inner ears) | 5 g |
| Black embroidery thread | Small amount |
| White embroidery thread or thin nylon thread (whiskers) | Small amount |
| Crochet hook | 3 mm |
| Safety eyes, amber/gold with black pupil, 14 mm | 2 |
| Fiberfill stuffing | Required |
| Stitch markers | Required |
| Yarn needle | 1 |
| Sewing pins | Required |
Not sure which yarn to choose? Read our guide to the best yarn for crochet projects.
4. Abbreviations (US Terms)
| Abbreviation | Meaning |
|---|---|
| MR | magic ring |
| ch | chain |
| sl st | slip stitch |
| sc | single crochet |
| hdc | half double crochet |
| dc | double crochet |
| inc | increase, 2 sc in same stitch |
| dec | invisible single crochet decrease |
| BLO / FLO | back loop only / front loop only |
| st / sts | stitch / stitches |
| rnd | round |
| RS / WS | right side / wrong side |
| rep | repeat |
| FO | fasten off |
New to a term? Our crochet stitches tutorials and crochet techniques tutorials explain each one.
5. Stitch Guide
Magic ring
Make an adjustable loop, work the stated number of stitches into the loop, then pull the tail to close.
Increase and invisible decrease
Increase: work 2 sc into the same stitch. Invisible decrease: insert hook into the front loop of the next stitch, then into the front loop of the following stitch. Yarn over, pull through both front loops, yarn over, pull through both loops on hook.
Flattened seam single crochet
Flatten the opening so front and back stitches align. Insert hook through one front stitch and one back stitch at the same time, then work 1 sc through both layers.
Surface crochet tabby stripe
Hold dark orange yarn behind the finished orange fabric. Insert hook from front to back and back to front through the marked stitch line, pull up a loop, and sl st loosely across the surface. Do not tighten the fabric.
Embroidered stripe and whisker stitch
Embroidered stripe: use dark orange yarn on a yarn needle. Sew one straight stitch over the marked position and repeat over the same line 2 times for a visible stripe. Whiskers: use white embroidery or thin nylon thread, insert the needle through the muzzle side, carry the thread outward, then anchor with a tiny hidden stitch at the side of the face.
6. Parts List & Construction Overview
| Part | Quantity | Color |
|---|---|---|
| Head | 1 | Golden orange |
| Body | 1 | Golden orange |
| Outer ears | 2 | Golden orange |
| Inner ears | 2 | Pale peach |
| White cheek-muzzle circles | 2 | White |
| Front legs | 2 | White paws + orange legs |
| Back legs | 2 | White paws + orange legs |
| Tail | 1 | Orange with dark orange stripes |
| Forehead stripes | 5 | Dark orange |
| Face side stripes | 6 | Dark orange |
| Body stripes | 10 | Dark orange |
| Leg stripes | 8 | Dark orange |
| Paw toe lines | 12 | Golden orange |
| Whiskers | 6 | White |
| Nose and mouth | 1 embroidered set | Black or dark brown |
Construction overview
- Crochet the head, insert safety eyes, then stuff and close it.
- Crochet the oval horizontal body from chest to rump, then stuff and close it.
- Crochet two front legs and two back legs with white paws and orange upper legs.
- Crochet the striped tail.
- Crochet two outer ears and two inner ears, and sew the inner ears to the outer ears.
- Crochet two white cheek-muzzle circles and sew them to the lower front of the head.
- Embroider nose, mouth, toe lines and whiskers, then add the tabby markings.
- Sew ears to head, head to body, legs under the body and tail to the back of the body.
- Shape the cat into a standing position.
7. Part-by-Part Instructions
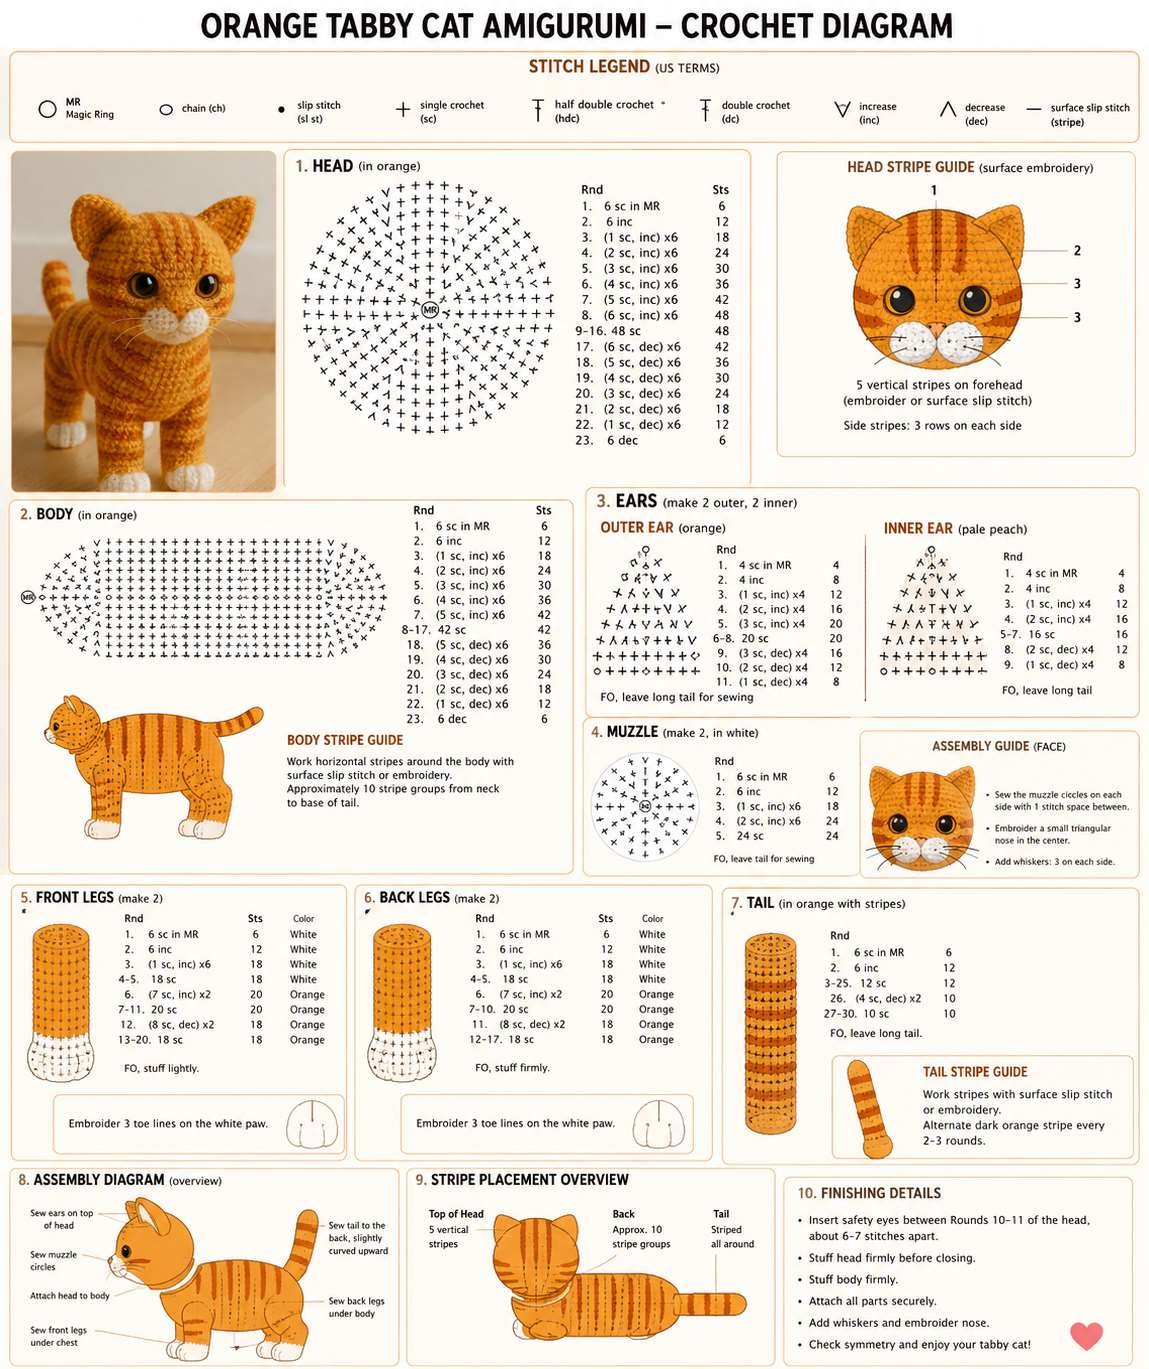
Work every part in a continuous spiral unless the pattern says to work flat in rows. Mark the first stitch of each round with a stitch marker.
Head
Use golden orange yarn and the 3 mm hook. Work in a continuous spiral.
| Rnd | Instruction | Stitch count |
|---|---|---|
| 1 | MR, work 6 sc into ring. | 6 |
| 2 | Inc in each st around. | 12 |
| 3 | *Sc in next 1 st, inc in next st; rep from * 6 times. | 18 |
| 4 | *Sc in next 2 sts, inc in next st; rep from * 6 times. | 24 |
| 5 | *Sc in next 3 sts, inc in next st; rep from * 6 times. | 30 |
| 6 | *Sc in next 4 sts, inc in next st; rep from * 6 times. | 36 |
| 7 | *Sc in next 5 sts, inc in next st; rep from * 6 times. | 42 |
| 8 | *Sc in next 6 sts, inc in next st; rep from * 6 times. | 48 |
| 9 | *Sc in next 7 sts, inc in next st; rep from * 6 times. | 54 |
| 10 | *Sc in next 8 sts, inc in next st; rep from * 6 times. | 60 |
| 11–18 | Sc in each st around. | 60 each rnd |
Insert safety eyes between Rnds 14 and 15, with 11 sts between the inner eye edges.
| Rnd | Instruction | Stitch count |
|---|---|---|
| 19 | *Sc in next 8 sts, dec; rep from * 6 times. | 54 |
| 20 | *Sc in next 7 sts, dec; rep from * 6 times. | 48 |
| 21 | *Sc in next 6 sts, dec; rep from * 6 times. | 42 |
| 22 | *Sc in next 5 sts, dec; rep from * 6 times. | 36 |
Begin stuffing the head firmly.
| Rnd | Instruction | Stitch count |
|---|---|---|
| 23 | *Sc in next 4 sts, dec; rep from * 6 times. | 30 |
| 24 | *Sc in next 3 sts, dec; rep from * 6 times. | 24 |
| 25 | *Sc in next 2 sts, dec; rep from * 6 times. | 18 |
Finish stuffing. Shape into a rounded cat head, slightly wider across eye level.
| Rnd | Instruction | Stitch count |
|---|---|---|
| 26 | *Sc in next st, dec; rep from * 6 times. | 12 |
| 27 | Dec around 6 times. | 6 |
FO, leaving an 8 in / 20 cm tail. Thread the tail through the final 6 front loops and pull closed.
Body
The body is worked horizontally from chest to rump. Use golden orange yarn and the 3 mm hook, in a continuous spiral.
| Rnd | Instruction | Stitch count |
|---|---|---|
| 1 | MR, work 6 sc into ring. | 6 |
| 2 | Inc in each st around. | 12 |
| 3 | *Sc in next 1 st, inc; rep from * 6 times. | 18 |
| 4 | *Sc in next 2 sts, inc; rep from * 6 times. | 24 |
| 5 | *Sc in next 3 sts, inc; rep from * 6 times. | 30 |
| 6 | *Sc in next 4 sts, inc; rep from * 6 times. | 36 |
| 7 | *Sc in next 5 sts, inc; rep from * 6 times. | 42 |
| 8 | *Sc in next 6 sts, inc; rep from * 6 times. | 48 |
| 9–23 | Sc in each st around. | 48 each rnd |
| 24 | *Sc in next 6 sts, dec; rep from * 6 times. | 42 |
| 25 | *Sc in next 5 sts, dec; rep from * 6 times. | 36 |
Begin stuffing the body firmly.
| Rnd | Instruction | Stitch count |
|---|---|---|
| 26 | *Sc in next 4 sts, dec; rep from * 6 times. | 30 |
| 27 | *Sc in next 3 sts, dec; rep from * 6 times. | 24 |
| 28 | *Sc in next 2 sts, dec; rep from * 6 times. | 18 |
Finish stuffing. Shape the body into a horizontal oval with a rounded chest and rump.
| Rnd | Instruction | Stitch count |
|---|---|---|
| 29 | *Sc in next st, dec; rep from * 6 times. | 12 |
| 30 | Dec around 6 times. | 6 |
FO and close. Body orientation: Rnds 1–8 form the front chest end, Rnds 9–23 form the long torso, and Rnds 24–30 form the rear rump end.
Front Legs (make 2)
Start with white yarn.
| Rnd | Instruction | Stitch count |
|---|---|---|
| 1 | MR, work 6 sc into ring. | 6 |
| 2 | Inc in each st around. | 12 |
| 3 | *Sc in next st, inc; rep from * 6 times. | 18 |
| 4 | Sc in each st around. | 18 |
| 5 | Sc in next 6 sts, dec 3 times, sc in next 6 sts. | 15 |
| 6 | Sc in next 5 sts, dec 2 times, sc in next 6 sts. | 13 |
Change to golden orange.
| Rnd | Instruction | Stitch count |
|---|---|---|
| 7 | Sc in each st around. | 13 |
| 8–17 | Sc in each st around. | 13 each rnd |
Stuff the white paw firmly and the orange leg moderately.
| Rnd | Instruction | Stitch count |
|---|---|---|
| 18 | Flatten opening. Sc through both layers across 6 sts. | 6 sc |
FO, leaving a 14 in / 35 cm sewing tail. Toe embroidery (golden orange yarn): sew 3 vertical toe lines, each 3 rows long, on the front of the white paw. Place the left and right lines 2 sts either side of the center line.
Back Legs (make 2)
Start with white yarn.
| Rnd | Instruction | Stitch count |
|---|---|---|
| 1 | MR, work 6 sc into ring. | 6 |
| 2 | Inc in each st around. | 12 |
| 3 | *Sc in next st, inc; rep from * 6 times. | 18 |
| 4 | Sc in each st around. | 18 |
| 5 | Sc in next 6 sts, dec 3 times, sc in next 6 sts. | 15 |
Change to golden orange.
| Rnd | Instruction | Stitch count |
|---|---|---|
| 6 | Sc in each st around. | 15 |
| 7–13 | Sc in each st around. | 15 each rnd |
Stuff the white paw firmly and the upper leg lightly.
| Rnd | Instruction | Stitch count |
|---|---|---|
| 14 | Flatten opening. Sc through both layers across 7 sts. | 7 sc |
FO, leaving a 14 in / 35 cm sewing tail. Toe embroidery (golden orange yarn): sew 3 vertical toe lines, each 3 rows long, on the front of the white paw.
Tail
Use golden orange and dark orange yarn. Work from tail tip to base in a continuous spiral, starting with dark orange.
| Rnd | Instruction | Stitch count |
|---|---|---|
| 1 | MR, work 6 sc into ring. | 6 |
| 2 | *Sc in next st, inc; rep from * 3 times. | 9 |
| 3 | Sc in each st around. | 9 |
| 4–5 | Change to golden orange. Sc in each st around. | 9 each rnd |
| 6–7 | Change to dark orange. Sc in each st around. | 9 each rnd |
| 8–10 | Change to golden orange. Sc in each st around. | 9 each rnd |
| 11–12 | Change to dark orange. Sc in each st around. | 9 each rnd |
| 13–15 | Change to golden orange. Sc in each st around. | 9 each rnd |
| 16–17 | Change to dark orange. Sc in each st around. | 9 each rnd |
| 18–22 | Change to golden orange. Sc in each st around. | 9 each rnd |
Stuff lightly as you work. Do not overstuff.
| Rnd | Instruction | Stitch count |
|---|---|---|
| 23 | Flatten opening. Sc through both layers across 4 sts. | 4 sc |
FO, leaving a 16 in / 40 cm sewing tail. Tail shape: bend the tail upward from the base, curve it slightly toward the left as seen from the back, and sew the first 1.5 in / 4 cm against the body for stability.
Outer Ears (make 2)
Use golden orange yarn. Work flat in rows. Foundation: ch 13.
| Row | Instruction | Stitch count |
|---|---|---|
| 1 (RS) | Sc in 2nd ch from hook and in each ch across. | 12 |
| 2 (WS) | Ch 1, turn. Sc in each st across. | 12 |
| 3 | Ch 1, turn. Dec, sc in next 8 sts, dec. | 10 |
| 4 | Ch 1, turn. Sc in each st across. | 10 |
| 5 | Ch 1, turn. Dec, sc in next 6 sts, dec. | 8 |
| 6 | Ch 1, turn. Sc in each st across. | 8 |
| 7 | Ch 1, turn. Dec, sc in next 4 sts, dec. | 6 |
| 8 | Ch 1, turn. Dec, sc in next 2 sts, dec. | 4 |
| 9 | Ch 1, turn. Dec twice. | 2 |
| 10 | Ch 1, turn. Dec. | 1 |
Do not fasten off. Border: ch 1. Work 10 sc evenly down the first side edge, 12 sc across the foundation edge, 10 sc evenly up the second side edge and 3 sc in the top point. Sl st to the first border sc (35 sc). FO, leaving a 12 in / 30 cm sewing tail.
Inner Ears (make 2)
Use pale peach yarn. Foundation: ch 9.
| Row | Instruction | Stitch count |
|---|---|---|
| 1 (RS) | Sc in 2nd ch from hook and in each ch across. | 8 |
| 2 (WS) | Ch 1, turn. Sc in each st across. | 8 |
| 3 | Ch 1, turn. Dec, sc in next 4 sts, dec. | 6 |
| 4 | Ch 1, turn. Sc in each st across. | 6 |
| 5 | Ch 1, turn. Dec, sc in next 2 sts, dec. | 4 |
| 6 | Ch 1, turn. Dec twice. | 2 |
| 7 | Ch 1, turn. Dec. | 1 |
Do not fasten off. Border: ch 1. Work 7 sc evenly down the first side edge, 8 sc across the foundation edge, 7 sc evenly up the second side edge and 3 sc in the top point. Sl st to the first border sc (25 sc). FO, leaving a 10 in / 25 cm sewing tail. Sew one inner ear centered onto each outer ear, with the inner ear lower edge 2 rows above the outer ear lower edge.
White Cheek-Muzzle Circles (make 2)
Use white yarn.
| Rnd | Instruction | Stitch count |
|---|---|---|
| 1 | MR, work 6 sc into ring. | 6 |
| 2 | Inc in each st around. | 12 |
| 3 | *Sc in next st, inc; rep from * 6 times. | 18 |
| 4 | Sc in each st around. | 18 |
FO, leaving a 12 in / 30 cm sewing tail. Each circle measures 0.9 in / 2.3 cm wide and 0.9 in / 2.3 cm high.
Face Details
| Feature | Placement and instructions |
|---|---|
| Cheek-muzzle circles | Place the two white circles side by side on the lower front of the head. Top edge sits between Head Rnds 16 and 17, bottom edge between Rnds 20 and 21. Inner edges touch at the vertical center line, and each outer edge sits 2 sts inside its eye. Sew around the final 18 stitches of each circle. Do not stuff separately. |
| Nose | Black or dark brown embroidery thread. Sits at the top center where both circles meet: 3 sts wide, 2 rows high, a small upside-down triangle. Work satin stitches until filled. |
| Mouth | Black or dark brown thread. Sew one vertical stitch from the lower point of the nose down 2 rows, then one small curved stitch from the bottom of that line to each cheek. |
| Whiskers | White embroidery or thin nylon thread, 3 per side. Upper: 1.5 in / 3.8 cm, angled slightly up. Middle: 1.75 in / 4.5 cm, straight out. Lower: 1.5 in / 3.8 cm, angled slightly down. Mirror on the right side and secure with hidden knots inside the cheek stitches. |
Tabby Stripes
Use dark orange yarn. Work the stripes after the eyes and muzzle are attached, and keep every pair mirrored.
| Area | Stripe | Position and stitches |
|---|---|---|
| Forehead (5) | Center | 9 surface sl sts from Head Rnd 5 down to Rnd 13 along the center front line, ending 1 round above the eye line |
| Forehead | Left and right | Begin 3 sts from center at Head Rnd 6. Work 7 surface sl sts downward toward center, ending at Rnd 13, 1 st from the center stripe |
| Forehead | Outer left and right | Embroider one 5-st straight line from Head Rnd 8 to Rnd 12, angled toward the eye |
| Cheeks (6) | Stripe 1 | Embroider 4 sts horizontally at Head Rnd 15 |
| Cheeks | Stripe 2 | Embroider 5 sts horizontally at Head Rnd 17 |
| Cheeks | Stripe 3 | Embroider 4 sts horizontally at Head Rnd 19 (mirror on the right side) |
| Body stripe (10) | Position | Stitches |
|---|---|---|
| Stripe 1 | Body Rnd 10, upper back | 22 surface sl sts |
| Stripe 2 | Body Rnd 13, back and sides | 26 surface sl sts |
| Stripe 3 | Body Rnd 16, back and sides | 30 surface sl sts |
| Stripe 4 | Body Rnd 19, back and sides | 30 surface sl sts |
| Stripe 5 | Body Rnd 22, rear body | 24 surface sl sts |
| Stripe 6 | Body front Rnd 9, chest | 10 embroidered sts |
| Stripe 7 | Body front Rnd 12, chest | 12 embroidered sts |
| Stripe 8 | Body front Rnd 15, chest | 12 embroidered sts |
| Stripe 9 | Body front Rnd 18, chest | 10 embroidered sts |
| Stripe 10 | Body front Rnd 21, chest | 8 embroidered sts |
Do not work body stripes across the white paws.
| Leg stripes (8) | Stripe 1 | Stripe 2 |
|---|---|---|
| Each front leg | Around Leg Rnd 9, 8 embroidered sts across front | Around Leg Rnd 13, 8 embroidered sts across front |
| Each back leg | Around Leg Rnd 7, 8 embroidered sts | Around Leg Rnd 10, 8 embroidered sts |
8. Stitch Count Summary
| Part | Final round and count |
|---|---|
| Head | Rnd 10 peaks at 60 sts, finishes at 6 sts on Rnd 27 |
| Body | Rnd 8 reaches 48 sts, finishes at 6 sts on Rnd 30 |
| Front legs | 13 sts before flattening, 6 sc after |
| Back legs | 15 sts before flattening, 7 sc after |
| Tail | 9 sts from Rnd 2 to Rnd 22, 4 sc after flattening |
| Outer ear | 12 sc foundation, 35 sc border |
| Inner ear | 8 sc foundation, 25 sc border |
| Cheek-muzzle circle | 18 sc on Rnds 3 and 4 (2 circles) |
| Stripes and details | 5 forehead, 6 cheek, 10 body, 8 leg, 4 tail bands, 12 toe lines, 6 whiskers |
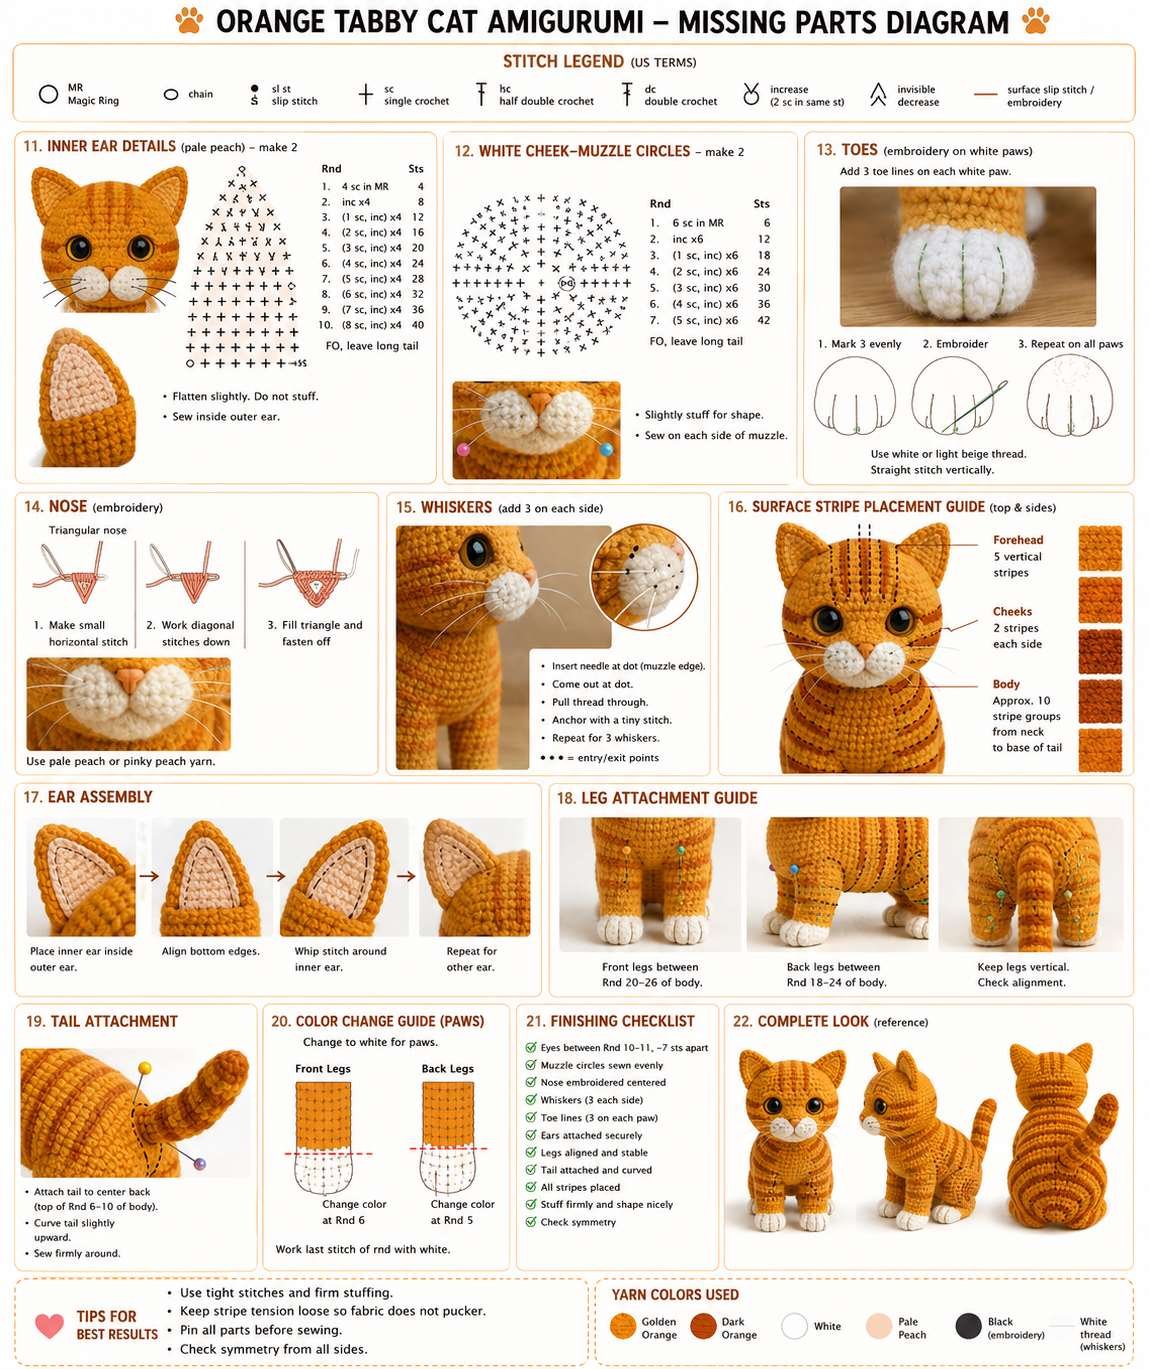
9. Placement Guide
| Piece | Exact placement |
|---|---|
| Head to body | Head attaches to the front chest end. Head lower center sits against Body Rnds 1–6. Sew around a 20-st oval contact area. Head tilts forward by 5 degrees. |
| Ears | Each ear base spans Head Rnds 5–10. Leave 12 sts between inner lower ear corners. Tips angle outward by 20 degrees and inner ears face forward. |
| Muzzle | White cheek circles sit below the eyes with inner edges touching at center front. Nose sits at the top center between the circles, mouth just below it. |
| Front legs | Attach under the front body between Body Rnds 6–12, with 5 sts between legs. White paws face forward and touch the table. |
| Back legs | Attach under the rear body between Body Rnds 18–24, with 8 sts between legs on the underside. White paws face forward. |
| Tail | Attach to the rear body at Body Rnds 24–27. Sew the first 1.5 in / 4 cm to the body and let the rest stand upward behind it. |
| Stripes | Forehead stripes run vertically and slightly inward, cheek stripes run horizontally, body stripes wrap across back and sides, leg stripes sit above the white paws. |
Layer order: sew the bottom layer first (body, head, outer ears, front legs, back legs, tail), then the middle layer (inner ears, cheek-muzzle circles, safety eyes, nose, mouth, whiskers), and finish with the top layer (forehead, cheek, body and leg stripes, tail bands and paw toe lines).
10. Assembly
Pin every piece in place and check symmetry from the front, back and sides before you sew.
- Stuff the head firmly and close the final 6-st opening. Stuff the body firmly and close the final 6-st opening.
- Inner ears: center each inner ear on its outer ear, sew around all 25 border stitches and leave the outer ear border visible.
- Ears to head: pin over Head Rnds 5–10, angle tips outward by 20 degrees, sew through the full lower edge and add 3 reinforcement stitches at each inner ear base.
- Cheek-muzzle circles: pin side by side, sew around all 18 outer stitches of each circle and keep them flat.
- Nose, mouth and whiskers: embroider the nose triangle, one vertical mouth line and a curved line to each side, then add 3 white whiskers per side.
- Head to body: position the head at the front chest end, sew around a 20-st oval and add 6 extra stitches under the chin for stability.
- Front legs: pin under Body Rnds 6–12 with paws forward, sew the flattened top edge to the underside and add 3 vertical reinforcement stitches on each side of each leg.
- Back legs: pin under Body Rnds 18–24 with paws flat and forward, sew the flattened top edge to the underside and add 3 reinforcement stitches at each leg side.
- Tail: attach at Body Rnds 24–27, sew the first 1.5 in / 4 cm upward along the rear body and shape it upright.
- Stripes and toes: work forehead stripes first, then cheeks, body and legs, and add 3 vertical toe lines to each white paw.
- Final shaping: press all four paws flat, adjust the body so it stands level, shape the head forward and the ears upright. The cat must stand without leaning to one side.
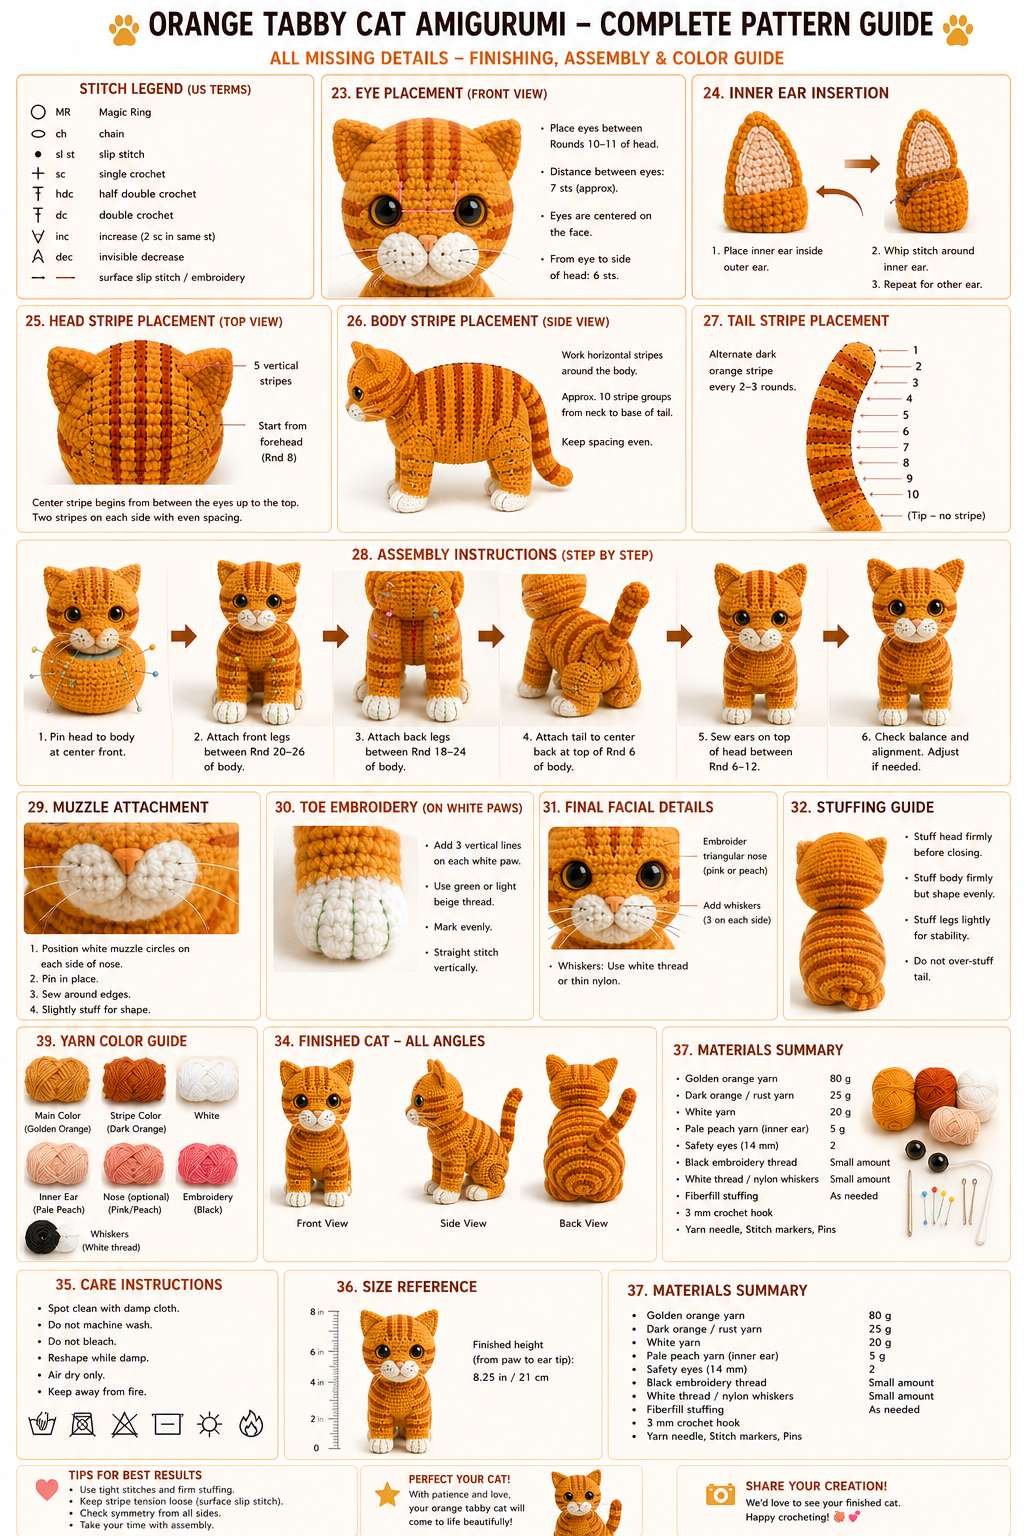
Care: spot clean with a damp cloth, do not machine wash or bleach, reshape while damp, air dry only and keep away from fire.
11. Final Checklist
| Check | Target |
|---|---|
| Head widest round | 60 sts |
| Body widest round | 48 sts, horizontal not seated |
| Safety eyes | Between Head Rnds 14 and 15, 11 sts apart |
| Cheek circles | 18 sts on final round |
| Ear borders | 35 sc outer, 25 sc inner |
| Legs before flattening | Front 13 sts, back 15 sts |
| Tail | 9 sts from Rnd 2 to Rnd 22, 4 dark bands |
| Stripes | 5 forehead, 3 per cheek side, 10 body, 2 per leg |
| Toe lines and whiskers | 3 per paw (12 total), 6 whiskers |
| Attachment | Front legs Body Rnds 6–12, back legs Rnds 18–24, tail Rnds 24–27 |
| Finished height | 8.25 in / 21 cm, standing on four white paws |
More Free Crochet Patterns You Will Love
Loved making this tabby? Try these next, or browse every design on our free crochet patterns page.
- Crochet Ghost Witch – Free Amigurumi Pattern
- Amigurumi Winged Heart Pattern
- Amigurumi Star Crochet Pattern
- Frog Crochet Bookmark – Free Pattern
- More free crochet gift patterns
Made your own tabby cat? We would love to see it, so get in touch and share a photo. Happy crocheting!