
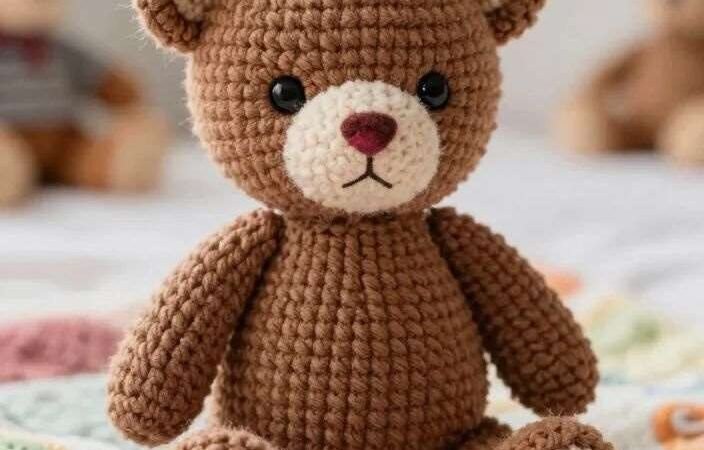
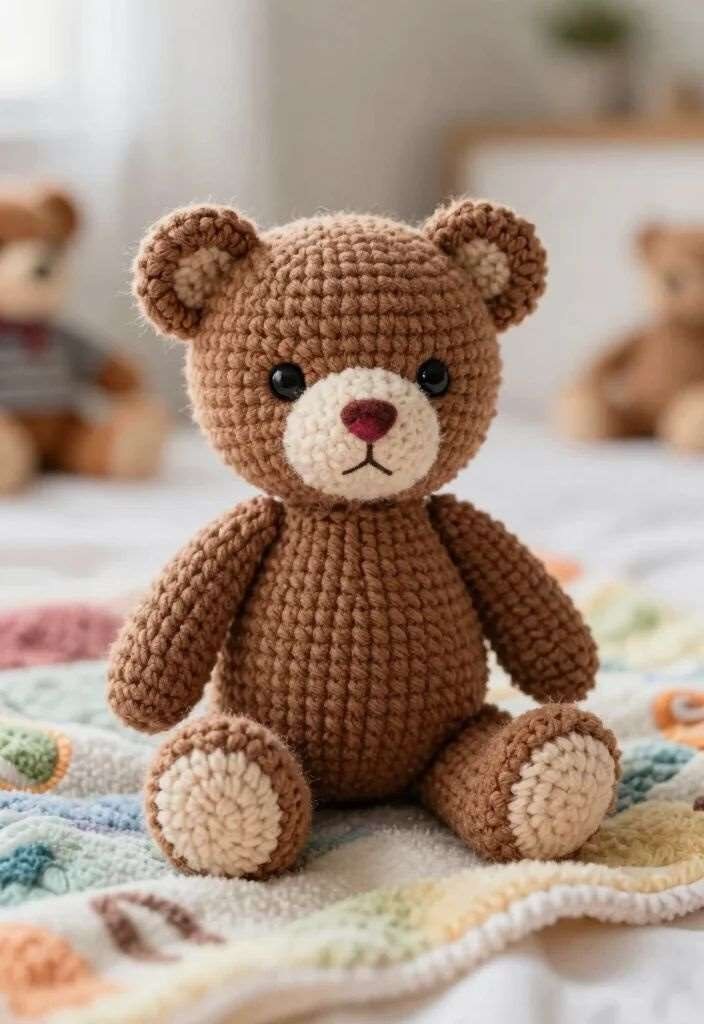
This teddy bear crochet pattern makes a classic sitting amigurumi bear in warm light brown with a cream muzzle, round cupped ears and cream foot pads. It is worked in continuous rounds with worsted weight yarn and a 3.00 mm hook, and finishes at about 7.5 in / 19 cm tall seated and 5.5 in / 14 cm wide.
The pattern is written in US crochet terms with round-by-round stitch counts, photo guides and a full placement map. It is beginner friendly if you are comfortable with the magic ring, single crochet, increases, invisible decreases, stuffing and basic sewing. If you enjoyed our Nordic Santa Bear or Orange Tabby Cat, browse more free amigurumi patterns or the full free crochet patterns collection after this one.
Jump to: Materials | Size and gauge | Head | Muzzle | Ears | Body | Arms | Legs | Assembly | Checklist | FAQ
Free Crochet Tools for This Pattern
Use our free calculators to check your tight amigurumi gauge (14 sc x 16 rounds = 2 in), estimate the 85-100 g of brown and 25-35 g of cream worsted yarn you need, convert the 3.00 mm hook (or 2.75 mm for loose stitchers) to your local size, and decode MR, inc, dec and BLO in this teddy bear pattern.

Save This Teddy Bear Pattern to Pinterest
Pin this free teddy bear crochet pattern to your amigurumi board so it is ready when you want to start, and follow Crochet Patterns Hub for more free patterns.
About This Pattern
| Project | Detail |
|---|---|
| Pattern type | Amigurumi teddy bear with round ears, cream muzzle, cream foot pads, black safety eyes and embroidered nose/mouth. |
| Skill level | Beginner friendly. Best for makers comfortable with magic ring, single crochet, increases, invisible decreases, stuffing and basic sewing. |
| Crochet terms | US crochet terminology (see how to read crochet patterns) |
| Finished size | Approx. 7.5 in. (19 cm) tall seated x 5.5 in. (14 cm) wide |
This pattern includes written stitch counts plus visual photo-style guides. Pin every part before final sewing so the teddy sits balanced and symmetrical.
1. Materials
| Item | Specification |
|---|---|
| Yarn – Main teddy | Worsted weight / medium 4 yarn, warm light brown, approx. 85-100 g. Not sure which yarn to pick? See our best yarn for crochet projects guide. |
| Yarn – Muzzle, inner ears, foot pads | Worsted weight / medium 4 yarn, cream or ivory, approx. 25-35 g. |
| Yarn / floss – Nose and mouth | Dark brown or burgundy yarn/floss, small amount. |
| Crochet hook | 3.00 mm for tight amigurumi tension. Use 2.75 mm if your stitches are loose. Compare sizes with the hook size converter. |
| Safety eyes | 8-9 mm black safety eyes, x 2. Embroider eyes instead for babies or children under 3. |
| Stuffing | Polyester fiberfill, medium amount. Stuff head and body firmly. |
| Notions | Yarn needle, embroidery needle, stitch markers, sewing pins, scissors, row counter, stuffing tool. |
Gauge is not critical, but the crochet fabric must be tight enough that stuffing does not show through. Do not use a loose, drapey gauge for amigurumi.
2. Finished Size and Gauge
| Measurement | Approximate result |
|---|---|
| Finished teddy height | 7.5 in. (19 cm) seated from foot base to top of ears. |
| Width | 5.5 in. (14 cm) across arms and legs. |
| Head | Approx. 4 in. (10 cm) wide. |
| Body | Approx. 4 in. (10 cm) tall before head attachment. |
| Suggested gauge | 14 sc x 16 rounds = approx. 2 in. (5 cm) square in tight amigurumi fabric. Check yours with the gauge calculator. |
3. Stitch Abbreviations
All terms are US crochet terms. New to reading patterns? Our guide on how to read crochet patterns explains the brackets and round counts, and the abbreviation lookup decodes any term instantly.
| Abbr. | Meaning | Abbr. | Meaning |
|---|---|---|---|
| MR | Magic ring | sc | Single crochet |
| inc | Increase – 2 sc in same st | dec | Invisible decrease |
| ch | Chain | sl st | Slip stitch |
| BLO | Back loop only | FLO | Front loop only |
| st / sts | Stitch / stitches | rnd | Round |
| rep | Repeat | FO | Fasten off |
| RS / WS | Right side / wrong side | approx. | Approximately |
4. Parts List
| Part | Qty | Color | Notes |
|---|---|---|---|
| Head | 1 | Light brown | Round amigurumi head with safety eyes. |
| Muzzle | 1 | Cream | Oval muzzle, lightly stuffed, nose and mouth embroidered before final sealing. |
| Outer ears | 2 | Light brown | Round cupped ears. |
| Inner ears | 2 | Cream | Sewn inside outer ears with brown border showing. |
| Body | 1 | Light brown | Pear-shaped seated body, open at top for head join. |
| Arms | 2 | Light brown | Rounded, lightly stuffed lower half. |
| Legs / feet | 2 | Cream + light brown | Cream foot pad worked first, brown leg built behind it. |
| Optional tail | 1 | Light brown | Tiny round tail for back of body. |
5. Construction Order
| Step | Action |
|---|---|
| 1 | Crochet head, insert safety eyes, stuff firmly and close. |
| 2 | Crochet muzzle, embroider nose and mouth, lightly stuff and sew to head. |
| 3 | Crochet outer ears and inner ears, sew inner pieces into outer ears, pinch bases, then attach to head. |
| 4 | Crochet body from bottom upward, stuff firmly and leave neck opening. |
| 5 | Crochet arms and legs/feet. Stuff lower portions only so they sit naturally. |
| 6 | Pin body parts first: head, arms, legs. Check sitting balance from front and side. |
| 7 | Sew all parts securely. Add optional tail. Weave all ends inside. |
| 8 | Final shaping: adjust face, even ears, foot pads facing forward, teddy sits flat. |
6. Part-by-Part Instructions
Every part is worked in continuous spiral rounds, so use a stitch marker to mark the first stitch of each round. If the magic ring or increases are new to you, read our guide to increasing in a crochet circle first, and brush up on the basics with 6 basic crochet stitches for beginners.
Head – Light Brown
| Rnd | Instructions | Count |
|---|---|---|
| 1 | MR, 6 sc | 6 |
| 2 | inc x 6 | 12 |
| 3 | (sc, inc) x 6 | 18 |
| 4 | (2 sc, inc) x 6 | 24 |
| 5 | (3 sc, inc) x 6 | 30 |
| 6 | (4 sc, inc) x 6 | 36 |
| 7 | (5 sc, inc) x 6 | 42 |
| 8 | (6 sc, inc) x 6 | 48 |
| 9-15 | sc around – 7 rounds even | 48 |
| 16 | (6 sc, dec) x 6 | 42 |
| 17 | (5 sc, dec) x 6 | 36 |
| 18 | (4 sc, dec) x 6 | 30 |
| – | Insert safety eyes between Rnds 12-13, spaced 8-9 sts apart. Lock firmly before stuffing. | – |
| 19 | (3 sc, dec) x 6 | 24 |
| 20 | (2 sc, dec) x 6 | 18 |
| 21 | (sc, dec) x 6 | 12 |
| 22 | dec x 6. Stuff firmly before closing. FO and close with yarn needle. | 6 |
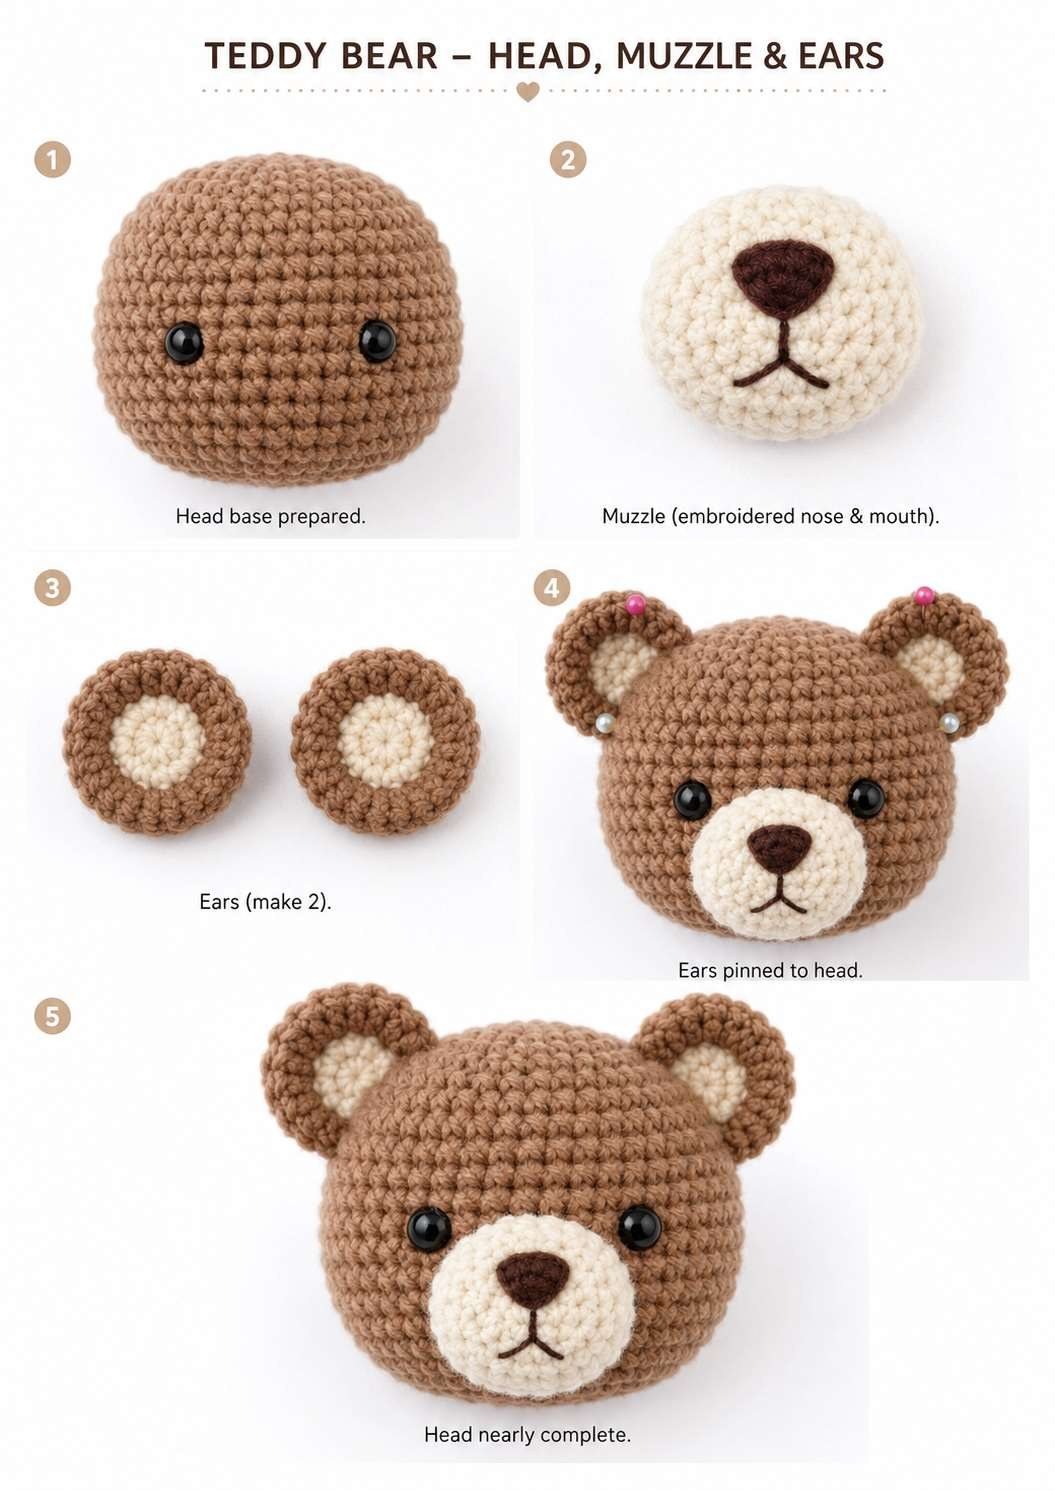
Head shaping checkpoint: the head should be round and full, not floppy. Add extra stuffing around the cheeks before the final closure. Keep the bottom slightly flat because this area sits on the body neck.
Muzzle – Cream
The muzzle starts with a foundation chain. If chains are new to you, see how to start a crochet chain.
| Rnd | Instructions | Count |
|---|---|---|
| 1 | ch 7. sc in 2nd ch from hook, 4 sc, 3 sc in last ch; along opposite side: 4 sc, inc | 14 |
| 2 | inc, 4 sc, inc x 3, 4 sc, inc x 2 | 20 |
| 3 | (sc, inc), 4 sc, (sc, inc) x 3, 4 sc, (sc, inc) x 2 | 26 |
| 4-5 | sc around – 2 rounds even | 26 |
| – | FO, leave a long sewing tail. Lightly stuff only after the nose and mouth are embroidered. | – |
Nose and mouth embroidery
- Mark the center top of the muzzle. The nose sits across the upper middle of the cream oval, approx. 5 sts wide and 3 rows tall.
- With dark brown or burgundy yarn/floss, make a small rounded triangle using satin stitches. Keep the top edge wider and the lower point centered.
- Bring the needle down from the nose point and make one vertical stitch approx. 2 rows long. Add two short diagonal smile stitches to form a soft teddy-bear mouth.
- Secure all embroidery tails on the wrong side of the muzzle before stuffing and sewing.
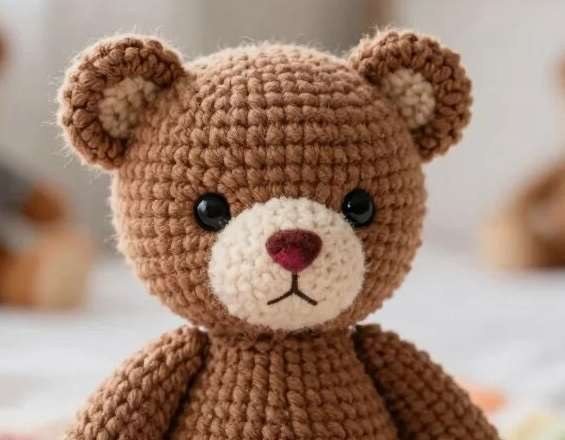
Muzzle placement: center the muzzle on the front of the head, covering approx. Head Rnds 13-18. The upper edge should sit just below and between the eyes. Stuff lightly before sealing the last 1 inch of the seam.
Ears – Outer Ear Light Brown, Inner Ear Cream
| Outer ear – make 2 | Instructions | Count |
|---|---|---|
| Rnd 1 | MR, 6 sc | 6 |
| Rnd 2 | inc x 6 | 12 |
| Rnd 3 | (sc, inc) x 6 | 18 |
| Rnd 4 | (2 sc, inc) x 6 | 24 |
| Rnd 5 | sc around | 24 |
| Rnd 6 | (2 sc, dec) x 6 – creates a shallow cup | 18 |
| – | FO, leave long tail for sewing to head. | – |
| Inner ear – make 2 | Instructions | Count |
|---|---|---|
| Rnd 1 | MR, 6 sc | 6 |
| Rnd 2 | inc x 6 | 12 |
| Rnd 3 | (sc, inc) x 6 | 18 |
| – | FO, leave a sewing tail. Sew centered inside the outer ear so a brown border shows. | – |
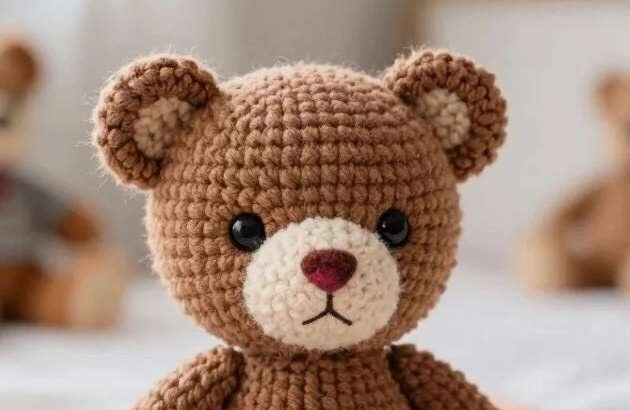
Ear assembly: sew each cream inner ear inside the brown outer ear. Pinch the base slightly to cup the ear forward. Attach ears to the upper sides of the head across Rnds 5-10. The ears should be round, balanced and visible from the front.
7. Body, Arms and Legs
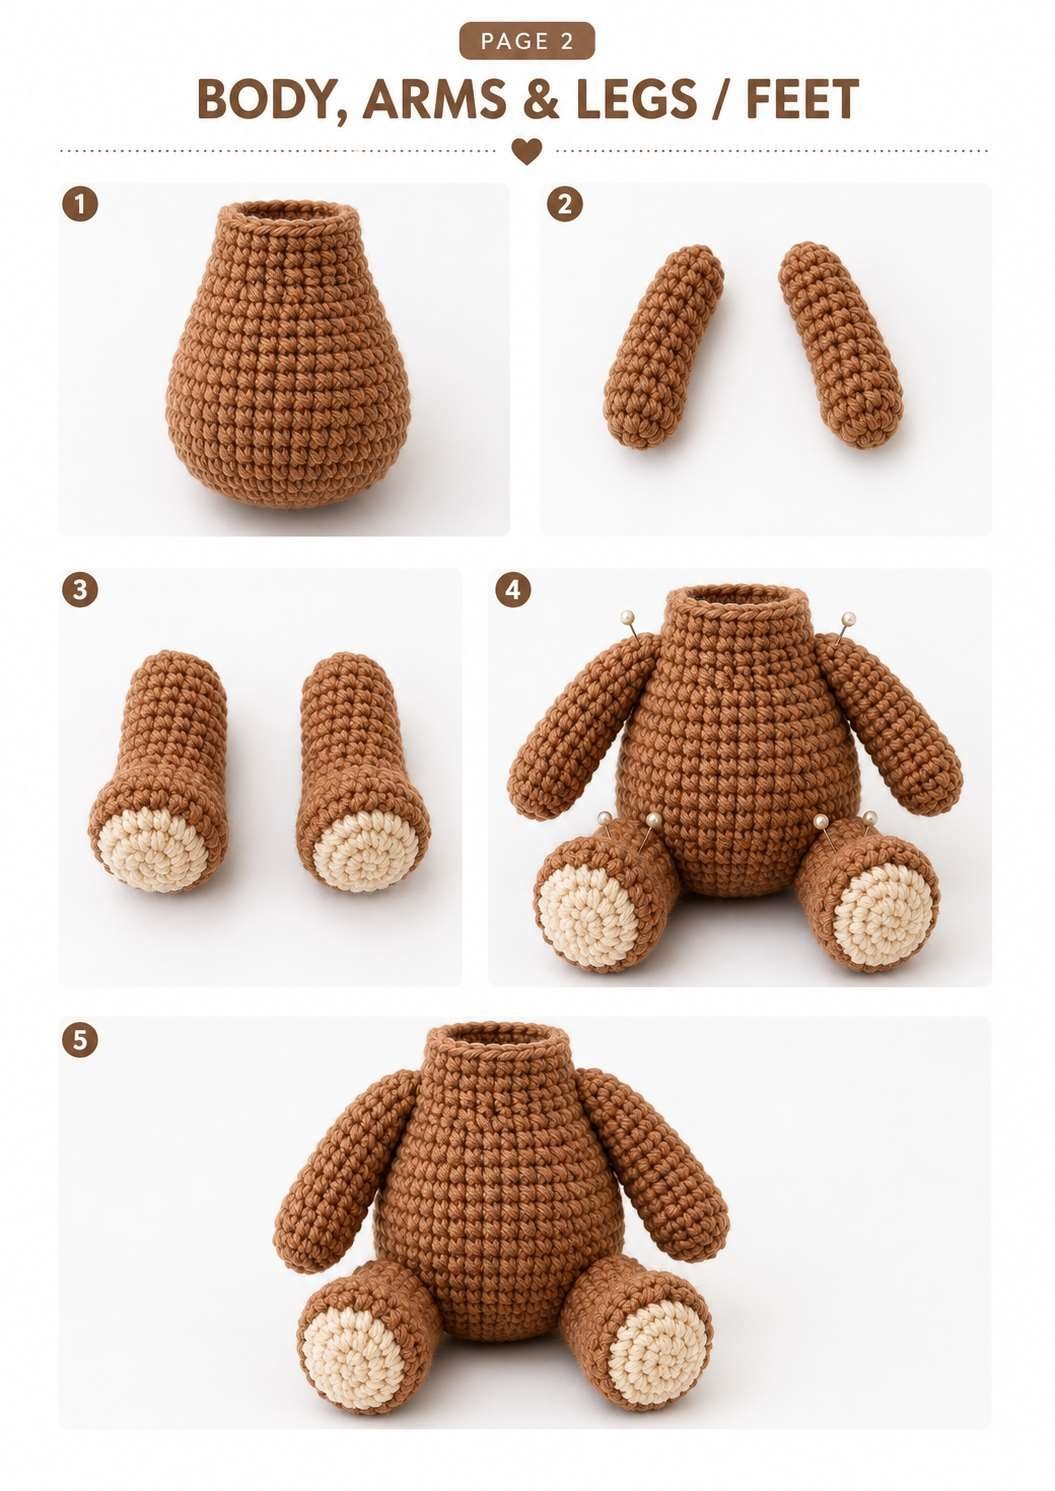
Body – Light Brown
| Rnd | Instructions | Count |
|---|---|---|
| 1 | MR, 6 sc | 6 |
| 2 | inc x 6 | 12 |
| 3 | (sc, inc) x 6 | 18 |
| 4 | (2 sc, inc) x 6 | 24 |
| 5 | (3 sc, inc) x 6 | 30 |
| 6 | (4 sc, inc) x 6 | 36 |
| 7 | (5 sc, inc) x 6 | 42 |
| 8 | (6 sc, inc) x 6 | 48 |
| 9-14 | sc around – 6 rounds even. This is the widest belly section. | 48 |
| 15 | (6 sc, dec) x 6 | 42 |
| 16 | sc around | 42 |
| 17 | (5 sc, dec) x 6 | 36 |
| 18-19 | sc around – 2 rounds even | 36 |
| 20 | (4 sc, dec) x 6 | 30 |
| 21 | sc around | 30 |
| 22 | (3 sc, dec) x 6 | 24 |
| 23 | sc around | 24 |
| 24 | (2 sc, dec) x 6 | 18 |
| 25 | sc around. Stuff firmly, leave top open and long tail for attaching head. | 18 |
Body shaping checkpoint: the bottom is round and full; the upper neck is narrower. Stuff the belly firmly so the bear can sit without collapsing.
Arms – Make 2, Light Brown
| Rnd | Instructions | Count |
|---|---|---|
| 1 | MR, 6 sc | 6 |
| 2 | inc x 6 | 12 |
| 3 | (3 sc, inc) x 3 | 15 |
| 4-8 | sc around – 5 rounds even | 15 |
| 9 | (3 sc, dec) x 3 | 12 |
| 10-16 | sc around – 7 rounds even | 12 |
| 17 | (2 sc, dec) x 3 | 9 |
| – | Stuff the rounded hand and lower half lightly. Leave upper 1 inch almost flat. Flatten opening and sew closed. | – |
Legs / Feet – Make 2, Cream Foot Pad + Light Brown Leg
| Rnd | Instructions | Count |
|---|---|---|
| 1 | With Cream: MR, 6 sc | 6 |
| 2 | inc x 6 | 12 |
| 3 | (sc, inc) x 6 | 18 |
| 4 | Switch to Light Brown. BLO sc around – creates foot-pad rim | 18 |
| 5 | sc around | 18 |
| 6 | (4 sc, dec) x 3 | 15 |
| 7-8 | sc around – 2 rounds even | 15 |
| 9 | (3 sc, dec) x 3 | 12 |
| 10-14 | sc around – 5 rounds even | 12 |
| 15 | (2 sc, dec) x 3 | 9 |
| – | Stuff foot firmly and upper leg lightly. Flatten opening and sew closed. Foot pad faces forward/upward when attached. | – |
Optional Tail – Light Brown
Rnd 1: MR, 6 sc. Rnd 2: inc x 6 (12). Rnd 3: sc around (12). Rnd 4: dec x 6 (6). Stuff lightly, close, and sew to the back lower body between Rnds 8-11.
8. Assembly Instructions
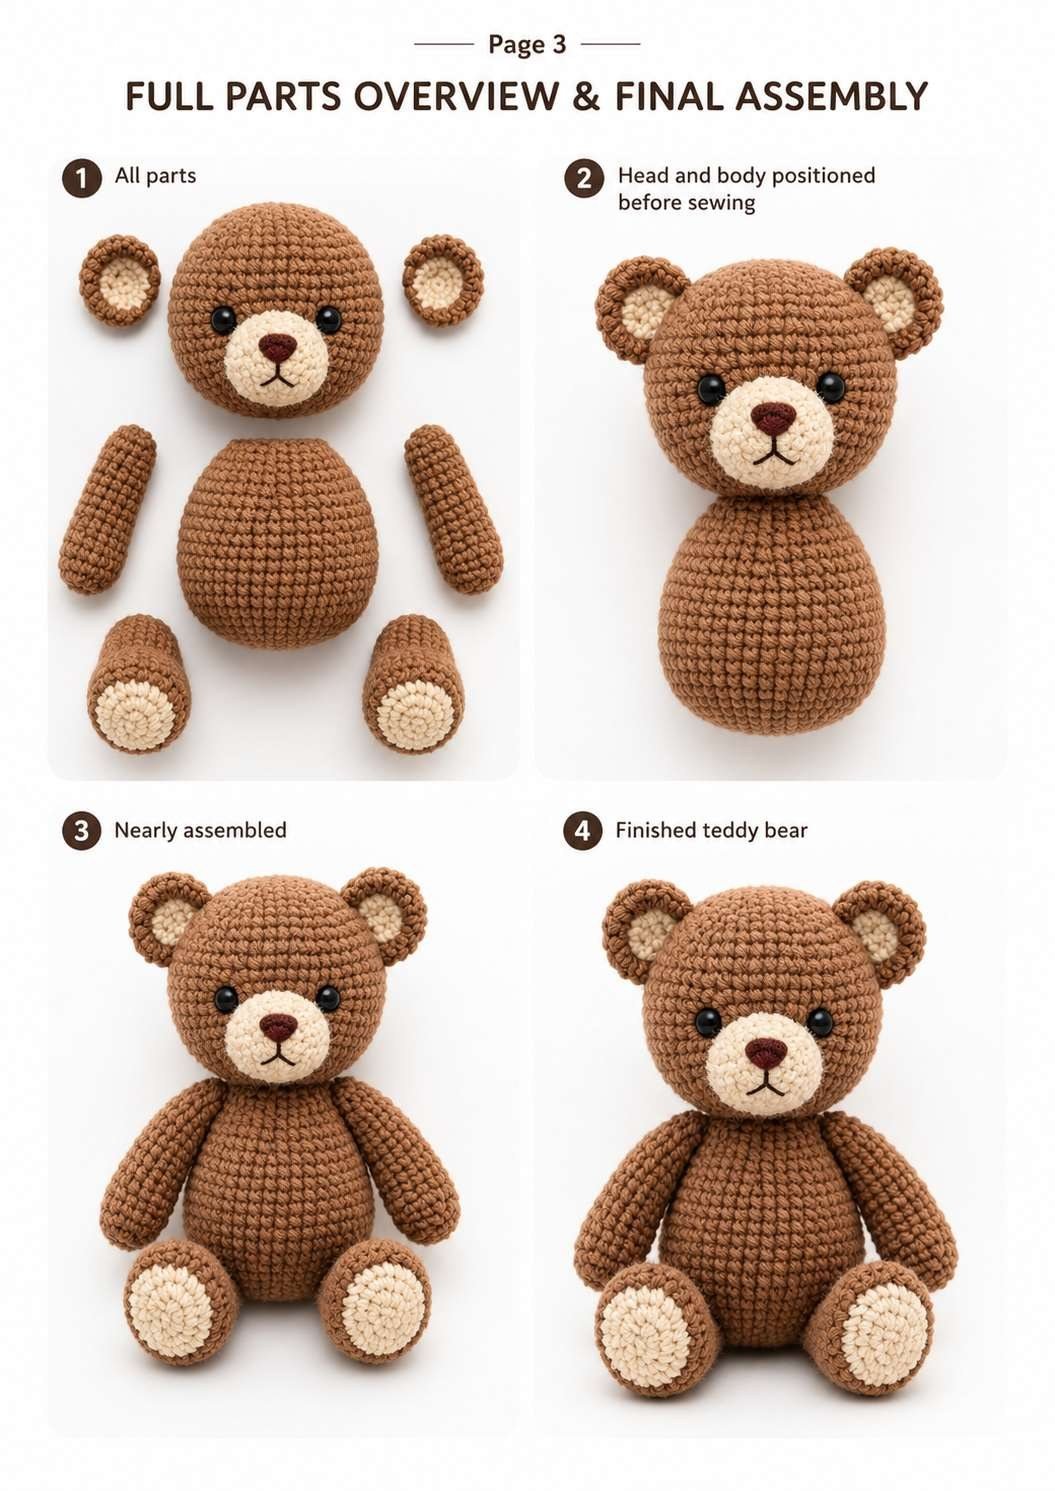
Pin every piece before sewing. This teddy relies on balanced ear height, centered muzzle, and seated leg angle. Do not sew permanently until the bear sits flat on a table.
| Step | Instructions |
|---|---|
| 1. Muzzle | Place muzzle centered on head front, covering approx. Head Rnds 13-18. Sew around the edge, adding a small amount of stuffing before closing the final 1 inch. |
| 2. Ears | Attach ears to the upper sides of the head across Rnds 5-10. The inner cream circles face forward. Sew all the way around the ear base. |
| 3. Head to body | Place body neck opening against the bottom of the head. The face should tilt very slightly downward for a cute seated expression. Sew around the neck twice for strength. |
| 4. Arms | Pin arms to upper body sides across Body Rnds 19-23, approx. 3-4 sts below the neck seam. Angle them downward and slightly forward. |
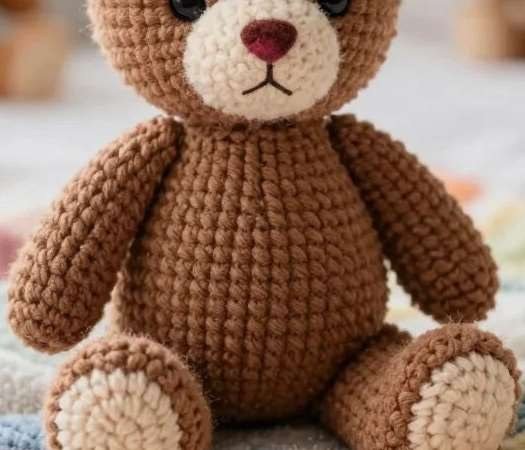
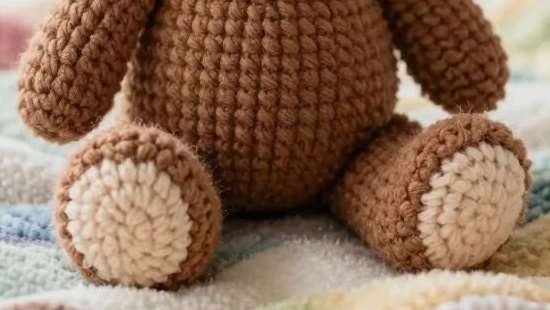
| 5. Legs | Pin legs to lower front body across Body Rnds 6-10. Foot pads face forward and slightly upward. Adjust until teddy sits without tipping. |
| 6. Tail | If using tail, sew it at the back lower body, centered between legs. |
| 7. Face check | Check both eyes are visible, nose is centered, mouth hangs straight down, and ears are even. |
| 8. Final secure | Reinforce all parts with a second sewing pass if the teddy will be handled often. |
9. Placement Map
| Feature | Exact placement guide |
|---|---|
| Eyes | Between Head Rnds 12-13, spaced 8-9 sts apart from center-front. |
| Muzzle | Centered below eyes, upper edge around Rnd 13, lower edge around Rnd 18. |
| Nose | Top-center of cream muzzle; approx. 5 sts wide, 3 rows tall. |
| Ears | Upper side of head, base across Rnds 5-10. Keep ears equal height and round. |
| Head join | Body neck opening centered to lower head; face points straight forward. |
| Arms | Upper side body, Rnds 19-23, angled downward. |
| Legs | Lower front body, Rnds 6-10; cream pads face front/up. |
| Tail | Optional, back lower body around Rnds 8-11. |
10. Stitch Counts Summary
| Part | Final key counts |
|---|---|
| Head | Max 48 sts. Close from 12 sts to 6 sts after stuffing. |
| Muzzle | Oval reaches 26 sts; 2 even rounds create shallow depth. |
| Outer ears | Max 24 sts; final 18 sts creates a shallow cup. |
| Inner ears | 18 sts flat circle, sewn inside outer ear. |
| Body | Max 48 sts; neck opening 18 sts. |
| Arms | Max 15 sts; taper to 9 sts before flattening. |
| Legs / feet | Cream foot pad reaches 18 sts; leg tapers to 9 sts. |
11. Beginner Helpful Notes
| Topic | Guidance |
|---|---|
| Magic ring | Pull the center closed tightly after Rnd 1. If a hole remains, sew it shut with the starting tail. |
| Invisible decrease | Insert hook under front loops of next 2 sts, yarn over, pull through both front loops, yarn over, pull through 2 loops. |
| Stuffing | Use small pieces of stuffing. Add gradually. Overstuffed pieces stretch stitches; understuffed pieces look flat. |
| Color change | For foot pads, finish the last yarn-over of the previous cream stitch with brown, then continue in brown. |
| Sewing | Use pins first. Sew through full stitches, not only surface fuzz, so parts stay secure. |
| Symmetry | Count rounds from the magic ring when placing eyes, ears and limbs. Pin both sides before sewing one side permanently. |
| Safety | For baby toys, embroider eyes instead of using safety eyes. |
Still building your amigurumi skills? Start with how to crochet for absolute beginners, check your hook grip for tight, even tension, or browse every crochet tutorial.
12. Final Assembly Checklist
| Check | Done |
|---|---|
| Safety eyes are locked firmly and evenly spaced. | ☐ |
| Muzzle is centered, lightly stuffed and sewn smoothly with no gaps. | ☐ |
| Nose is centered and mouth stitches are neat. | ☐ |
| Ears are round, even, and attached at the same height. | ☐ |
| Body is firmly stuffed and pear-shaped, not collapsing at the neck. | ☐ |
| Arms hang downward evenly and are attached securely. | ☐ |
| Legs sit at the lower front with cream foot pads facing forward/upward. | ☐ |
| Teddy sits flat without tipping backward or sideways. | ☐ |
| All yarn tails are woven inside the body/head; no loose ends are visible. | ☐ |
13. Final Look
Teddy Bear Crochet Pattern FAQ
What yarn and hook do I need for this teddy bear?
You need worsted weight / medium 4 yarn: about 85-100 g of warm light brown and 25-35 g of cream, plus a 3.00 mm hook (or 2.75 mm if your stitches are loose). Use our yarn estimator to check your stash and read the best yarn for crochet projects guide for softer or sturdier options.
Is this teddy bear pattern beginner friendly?
Yes, if you are comfortable with the magic ring, single crochet, increases, invisible decreases, stuffing and basic sewing. Every round has a stitch count so you can check your work. Brand new to crochet? Start with how to crochet for absolute beginners and how to increase in a crochet circle.
Is this amigurumi teddy bear safe for babies?
For babies or children under 3, embroider the eyes instead of using safety eyes, and sew every part on securely with a second sewing pass. See more soft makes in our free baby crochet patterns.
How big is the finished teddy bear?
The finished bear is about 7.5 in. (19 cm) tall when seated and 5.5 in. (14 cm) wide across the arms and legs, worked at a tight gauge of 14 sc x 16 rounds = approx. 2 in. (5 cm).
More Free Crochet Patterns You Will Love
Loved making this teddy? Try these next, or browse every design on our free crochet patterns page.
- Nordic Santa Bear Crochet Pattern – Free Amigurumi Christmas Teddy
- Orange Tabby Cat Amigurumi Free Crochet Pattern
- Crochet Ghost Witch – Free Amigurumi Pattern
- Nordic Star Gnome Crochet Pattern – Free Amigurumi Christmas Gnome
- Amigurumi Winged Heart Pattern
- More free amigurumi crochet patterns
- More free crochet gift patterns
Made your own teddy bear? We would love to see it, so get in touch and share a photo, and follow us on Pinterest for new free patterns. Happy crocheting!
Thank you! This original crochet pattern is intended for personal use and handmade small-batch finished items. Please do not copy, redistribute or resell the pattern itself.