
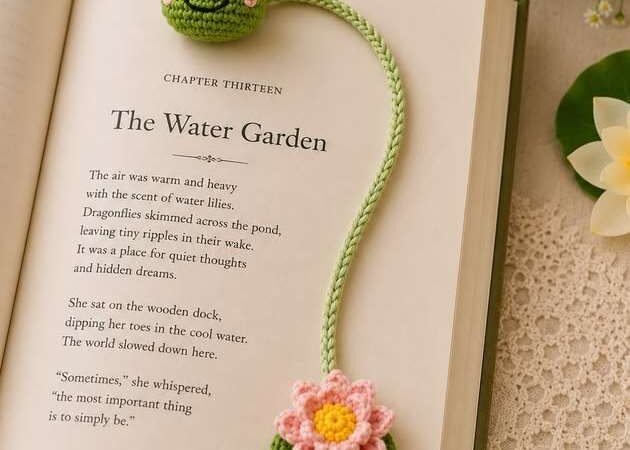
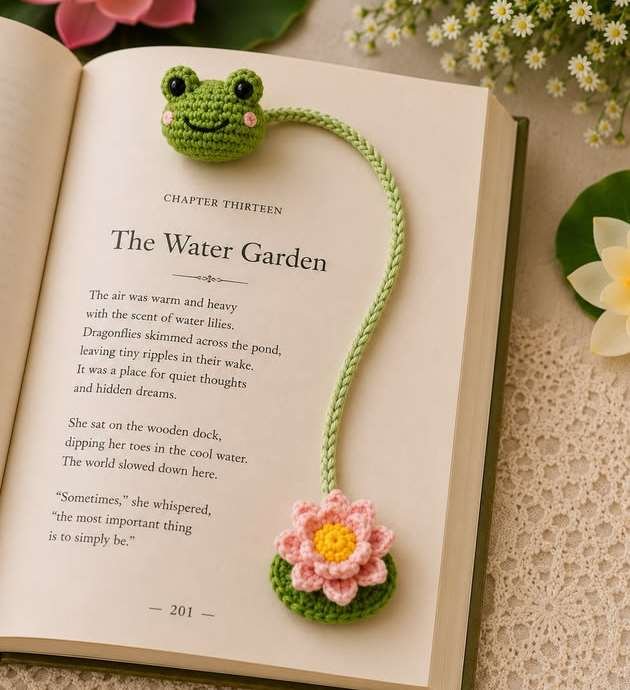
This frog crochet bookmark is a playful, practical and beginner-friendly project: a cheerful amigurumi frog head sits at the top of your page, a slim crocheted cord runs down the book, and a layered pink lotus flower rests on a leafy pad at the bottom. The frog and flower act as decorative stops at opposite ends of the book, so your place never slips.
The pattern is written in US crochet terms with complete stitch counts and assembly measurements. If you enjoy little stuffed projects, you’ll also love our free amigurumi patterns, and you can find more page-keepers in our crochet bookmark patterns collection.
Free Crochet Tools for This Pattern
Use our free calculators to check your gauge, estimate yarn, convert hook sizes and decode any abbreviation in this frog bookmark pattern.
1. About This Pattern
The bookmark is worked as four small components: the frog head, eyes and facial details, the cord, and the flower with its leaf pad.
| Project | Detail |
|---|---|
| Skill level | Confident beginner (new to crochet? Start with how to crochet for absolute beginners) |
| Finished length | Approx. 31 cm / 12.25 in |
| Frog head | Approx. 5.5 x 4 cm |
| Flower pad | Approx. 5.5 cm diameter |
| Construction | Amigurumi in joined/continuous rounds |
| Time | About 2–3 hours |
Construction overview: 1. Crochet and lightly stuff the frog head. 2. Make two raised eyes and embroider the face. 3. Crochet the cord directly from the back of the head. 4. Make the flower and leaf pad separately. 5. Secure the cord between the flower and pad.
2. Materials
| Item | Recommendation |
|---|---|
| Yarn A – green | DK/light worsted cotton, 20 g |
| Yarn B – pink | DK cotton, 8 g |
| Yarn C – yellow | DK cotton, 3 g |
| Yarn D – black | Small amount for pupils |
| Yarn E – pale pink | Small amount for cheeks |
| Hook | 3.0 mm (or size needed for gauge) |
| Other | Tapestry needle, scissors, stitch marker |
| Stuffing | Small pinch of polyester fiberfill |
| Optional | Two 6 mm safety eyes instead of crocheted pupils |
Yarn note: Smooth cotton gives crisp stitches and a firm cord. Acrylic may also be used, but choose a yarn with good twist and avoid fuzzy fibers that may catch between book pages. Not sure what to buy? See our guide to the best yarn for crochet projects.
Safety: If made for a young child, embroider the pupils instead of using safety eyes. This item is decorative and is not a toy or teether.
3. Yarn Color Guide
| Role | Suggested color | Approx. length |
|---|---|---|
| Frog + cord | Leaf green | 35 m / 38 yd |
| Flower petals | Blush pink | 15 m / 16 yd |
| Flower center | Golden yellow | 5 m / 5.5 yd |
| Pupils | Black | 1 m / 1 yd |
| Cheeks | Soft pink | 1 m / 1 yd |
Color planning: High contrast between the frog and pupils keeps the expression clear. The flower can be made in any two contrasting colors. Keep the cord and leaf pad the same green for a cohesive finish.
Substitution rule: Match yarn weight rather than brand. If using a heavier yarn, increase the hook proportionally and expect a larger finished bookmark.
4. Abbreviations (US Terms)
| Abbr. | Meaning | How it is used |
|---|---|---|
| MR | magic ring | Adjustable starting loop |
| ch | chain | Yarn over and pull through loop |
| sl st | slip stitch | Join or move without adding height |
| sc | single crochet | Insert, yarn over, pull up loop, yarn over through 2 |
| hdc | half double crochet | YO, insert, pull up loop, YO through 3 |
| dc | double crochet | YO, insert, pull up loop, YO through 2 twice |
| inc | increase | Work 2 sc in one stitch |
| dec | invisible decrease | Work next 2 front loops together |
| BLO | back loop only | Work into back loop only |
| FO | fasten off | Cut yarn and pull end through |
| st(s) | stitch(es) | Individual crochet loops |
| R/Rnd | row/round | Instruction unit |
Pattern language: Parentheses show a repeated sequence. The number in brackets at the end of each round is the total stitch count. Example: (sc, inc) x 6 [18]. For a full walkthrough, read how to read crochet patterns.
5. Stitch Guide
Magic ring
Wrap yarn around two fingers, insert hook under the first strand, pull up a loop, chain 1, then work the required stitches into the ring. Pull the tail firmly to close.
Invisible decrease
Insert hook into the front loop of each of the next 2 stitches. Yarn over and pull through both front loops, yarn over and pull through the remaining 2 loops.
Surface embroidery
Use the spaces between stitches as a grid. Bring the needle up at the first point, span the required stitches, then take the needle down without pulling tightly.
Cord chain
Make each chain the same height. Keep the hook close to the previous chain and relax your grip — our guide on how to hold a crochet hook helps keep tension even. Measure the cord without stretching.
| Check | Correct result |
|---|---|
| Magic ring | No visible center hole |
| Single crochet | Firm V-shaped stitches |
| Decrease | Minimal bump on right side |
| Cord | Straight and flexible, not twisted |
Need a refresher on the basics? Practise with our 6 basic crochet stitches every beginner should know.
6. Gauge & Notes Before Starting
| Gauge | Target |
|---|---|
| Round gauge | 6 sc rounds = approx. 2.5 cm |
| Stitch gauge | 6 sc = approx. 2.5 cm |
| Cord gauge | 10 chains = approx. 4 cm |
| Hook/Yarn | 3.0 mm with DK cotton |
Gauge adjustment: If your swatch is larger, use a smaller hook; if smaller, use a larger hook. The exact gauge is less important than a dense fabric that does not show stuffing.
Before you begin
- Read each complete section before crocheting.
- Place a marker in the first stitch of every continuous round.
- Count stitches after each increase/decrease round.
- Stuff the frog lightly; overstuffing will distort the smile.
- Leave long tails where noted for sewing.
Finished length: The sample cord measures 24 cm / 9.5 in between motifs; total length is about 31 cm / 12.25 in. Add or remove chains to suit the intended book size.
7. Frog Head Instructions
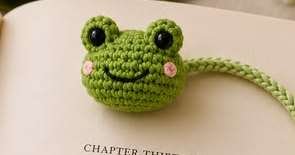
With green yarn, work in continuous rounds.
| Rnd | Instruction | Count |
|---|---|---|
| 1 | 6 sc in MR | 6 |
| 2 | inc in each st around | 12 |
| 3 | (sc, inc) x 6 | 18 |
| 4 | (2 sc, inc) x 6 | 24 |
| 5 | (3 sc, inc) x 6 | 30 |
| 6–8 | sc in each st around | 30 |
| 9 | (3 sc, dec) x 6 | 24 |
| 10 | (2 sc, dec) x 6 | 18 |
| 11 | (sc, dec) x 6 | 12 |
Stuff lightly, shaping the piece into a softly flattened oval. Rnd 12: dec x 6 [6]. Do not fasten off if working the cord directly from the head; continue with the bookmark cord instructions below.
Shaping tip: Before closing, press the head gently so the starting ring sits at the front center and the final round sits at the back. The head should be wider than it is tall.
Love making little heads and faces? Try our amigurumi star crochet pattern or the amigurumi winged heart pattern next.
8. Eyes, Cheeks & Smile
Eye bumps – make 2
With green: Rnd 1: 6 sc in MR [6]. Rnd 2: inc around [12]. Rnd 3: sc around [12]. Add a tiny pinch of stuffing. Rnd 4: dec x 6 [6]. FO, leaving a 15 cm tail.
Pupils – make 2
With black: 6 sc in MR, sl st to first sc, FO. Alternatively attach 6 mm safety eyes through the center of each eye bump before sewing.
Placement
| Feature | Placement |
|---|---|
| Eye bumps | Top of head, centers 3 cm apart; lower edges touch Rnd 3 |
| Pupils | Centered slightly toward the front/inside of each bump |
| Smile | Curved line spanning 5 stitches across Rnds 5–7 |
| Cheeks | One small French knot at each smile end |
Beginner tip: Pin both eyes in place before sewing. View the head straight-on and adjust until the pupils sit at the same height.
9. Bookmark Cord Instructions
Continue with green yarn from the final frog-head round.
| Step | Instruction |
|---|---|
| 1 | After the last decrease, sl st across the opening to close it securely. |
| 2 | Ch 61 for a 24 cm / 9.5 in cord. Keep the chains even and relaxed. |
| 3 | Beginning in 2nd ch from hook, sl st in each ch back toward the frog [60 sl st]. |
| 4 | At the head, sl st through the back fabric to anchor. FO and weave the tail inside. |
| 5 | Block the cord gently with fingers; do not stretch. |
Length formula: Measure from the frog to the final chain. For a shorter bookmark, remove chains in groups of 5. For a longer bookmark, add chains in groups of 5. Every 5 chains changes length by about 2 cm / 0.8 in.
Optional round cord: Instead of slip stitching back, work 60 foundation single crochet or crochet an i-cord of equal length. This changes the appearance but not the assembly.
10. Flower Instructions
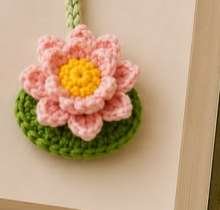
Flower center
With yellow: Rnd 1: 6 sc in MR [6]. Rnd 2: inc around [12]. Sl st to first sc and FO.
Inner petals
Join pink in any front loop of Rnd 2. In each front loop work: (sl st, ch 2, 2 hdc, ch 2, sl st). Repeat 12 times. FO.
Outer petals
Turn the center over. Join pink in any unused back loop of Rnd 2. In each back loop work: (sl st, ch 3, 2 dc, ch 3, sl st). Repeat 12 times. FO, leaving a 25 cm sewing tail.
| Checkpoint | Expected |
|---|---|
| Center | Approx. 2 cm diameter |
| Inner layer | 12 small rounded petals |
| Outer layer | 12 larger petals visible behind |
| Finished flower | Approx. 5 cm diameter |
Petal tip: After fastening off, spread the petals with your fingers. Steam lightly from a safe distance only if the yarn label permits.
11. Leaf Pad & Assembly
Leaf pad
With green: Rnd 1: 6 sc in MR [6]. Rnd 2: inc around [12]. Rnd 3: (sc, inc) x 6 [18]. Rnd 4: (2 sc, inc) x 6 [24]. Rnd 5: (3 sc, inc) x 6 [30]. Sl st and FO, leaving a 30 cm tail.
Assembly order
- Lay the leaf pad wrong side up. Place the free end of the cord across its center by 2 cm.
- Sew the cord to the pad with 5–6 secure whip stitches. Knot on the wrong side.
- Center the flower over the pad, right side up. Pin through the yellow center.
- Using the flower tail, sew around the base of the yellow center and tack every fourth outer petal.
- Weave all tails between layers. Check both ends with a firm tug.
Placement check: The flower should hide the cord attachment completely. The green pad should show as a narrow leafy border around the petals.
12. Finishing & Care
Final shaping
- Roll the cord gently between your palms to smooth it.
- Arrange both eye bumps symmetrically and lift the flower petals.
- Use the needle tip to hide any visible yarn tails.
Care
| Action | Method |
|---|---|
| Washing | Spot clean or hand wash briefly in cool water |
| Detergent | Use mild, bleach-free detergent |
| Drying | Press in a towel; reshape and dry flat |
| Heat | Do not iron; steam only from a distance |
| Storage | Lay flat or loosely coil; avoid sharp folds |
Final quality check: All parts secure; no stuffing visible; head lightly flattened; pupils aligned; smile centered; cord untwisted; flower attached through both layers; all yarn tails woven in for at least 3 cm.
13. Customization & Styling Ideas
| Idea | How to adapt |
|---|---|
| Daisy | White petals with yellow center |
| Lotus | Dusty pink inner petals and deep rose outer petals |
| Frog prince | Add a tiny yellow crown between the eyes |
| Long novel size | Ch 76; work 75 sl st back |
| Pocket book size | Ch 46; work 45 sl st back |
| Gift set | Make three bookmarks in coordinated colors |
| No stuffing | Flatten the head and omit fiberfill for a slimmer bookmark |
Keep the fit: When changing yarn weight, make all components with the same yarn and hook so the frog, cord, flower and pad stay proportional. Styling suggestion: Pair natural greens with blush, lavender, cream or sunflower yellow. A darker pupil and lighter cheek color keep the face readable.
Making a gift set to sell at a craft fair? Our free pricing calculator helps you set a fair price, and you’ll find more quick makes in our crochet gift patterns, like this crochet water bottle cozy.
14. Troubleshooting
| Problem | Likely cause | Fix |
|---|---|---|
| Head has gaps | Hook too large / stuffing too firm | Use smaller hook; reduce stuffing |
| Head is round, not oval | Too much stuffing | Remove some and press flat |
| Eyes lean outward | Uneven sewing tension | Re-pin, then sew opposite sides alternately |
| Cord curls | Chains too tight | Redo with relaxed chains or larger hook |
| Flower cups | Petals crowded / tension tight | Block gently; loosen petal stitches |
| Pad shows too much | Flower off-center | Reposition before final tacking |
| Stitch count is wrong | Missed first/last stitch | Use marker and recount previous round |
When to undo: If a shaping round is one stitch off, undo to the last correct round. Adding or skipping a stitch later can move the eye and smile placement and make the head asymmetrical.
15. Printer-Friendly Pattern Notes
| Quick materials | Quick size |
|---|---|
| DK cotton: green, pink, yellow, black | Total length approx. 31 cm |
| 3.0 mm hook; needle; marker; stuffing | Frog approx. 5.5 x 4 cm |
| US terms; confident beginner | Flower/pad approx. 5.5 cm |
Quick head: Green: 6 sc MR; inc x6 [12]; (sc,inc)x6 [18]; (2sc,inc)x6 [24]; (3sc,inc)x6 [30]; sc 3 rnds; (3sc,dec)x6 [24]; (2sc,dec)x6 [18]; (sc,dec)x6 [12]; stuff; dec x6 [6].
Quick cord: Close head. Ch 61; sl st in 2nd ch and across [60]. Secure at head.
Quick eyes: Make 2: 6 sc MR; inc x6 [12]; sc around; dec x6 [6]. Stuff lightly and sew. Add black pupils, smile and cheeks.
Quick flower: Yellow: 6 sc MR; inc x6 [12]. Pink inner petals in front loops: (sl st, ch2, 2hdc, ch2, sl st) x12. Outer petals in back loops: (sl st, ch3, 2dc, ch3, sl st) x12.
Quick pad: Green: 6 sc MR; inc [12]; (sc,inc)x6 [18]; (2sc,inc)x6 [24]; (3sc,inc)x6 [30]. Secure cord to center; sew flower over attachment.
You are finished!: Shape the frog, smooth the cord, arrange the petals and perform the final tug test. Enjoy your handmade reading companion.
Frequently Asked Questions
Can I sell finished bookmarks?
Yes, you may sell small quantities of finished items made by you. Do not redistribute or resell the written pattern or page designs.
Can I use a different yarn?
Yes. Choose a smooth yarn and a hook that creates dense fabric. The finished size will change — use the yarn estimator and hook converter in our free tools to plan the swap.
Why is my cord shorter than the sample?
Chain height varies by crocheter. Measure the cord before working back and add chains until it reaches the desired length.
Can the frog be sewn on separately?
Yes. Finish and close the head, make a separate cord, then sew one end firmly to the back center.
Is this suitable for a first project?
A confident beginner who can make a magic ring, single crochet, increase, decrease and sew pieces can complete it. Brand new? Start with our absolute beginner guide first.
Do I need safety eyes?
No. The pupils can be crocheted or embroidered, which is recommended for children.
More Free Patterns You’ll Love
Plan Your Next Make with Free Crochet Tools
Decode stitches, convert hook sizes, check gauge, estimate yarn and price your finished bookmarks — all free.