
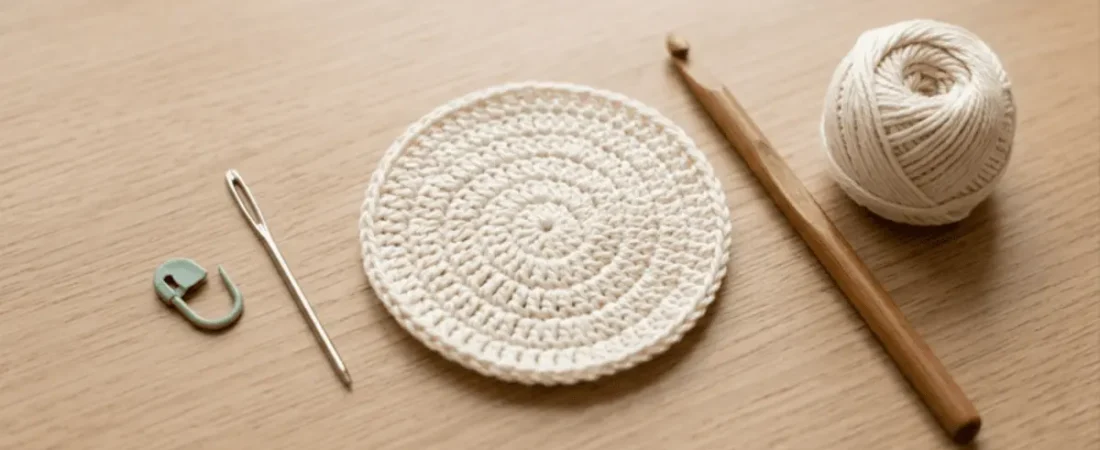
A magic ring, also called a magic circle, is an adjustable loop you crochet your first round into. Wrap the yarn around two fingers twice, pull a loop through with your hook, chain 1 to lock it, work your stitches into the ring over the tail, then pull the tail to close the center with no hole.
If your hats and amigurumi start with a little hole in the middle, the magic ring is the fix. It feels tricky the first time, but it’s really just one loop that you stitch into and then pull tight.
This guide shows two ways to make a magic ring, how many stitches to use, how to close and secure it, and what to do when it goes wrong.
New to crochet? Start with how to crochet for absolute beginners and the 6 basic crochet stitches, then come back here.
Key takeaways
- Magic ring, magic circle and adjustable ring are the same technique.
- Think of it as an adjustable slip knot that you crochet into.
- Work your first-round stitches over both the ring and the tail.
- Most patterns start with 6 single crochet.
- Secure the tail, or the ring can loosen later.
What Is a Magic Circle in Crochet?
Short answer: A magic circle is a loop of yarn that you crochet your first round into, then pull closed with the tail so no hole is left.
The simplest way to picture it is as a big slip knot. You stitch around it, then pull the tail and it tightens like a drawstring.
Other names and abbreviations
| Term | Meaning |
|---|---|
| Magic ring | Most common name |
| Magic circle | Same thing |
| Adjustable ring | Same thing |
| Magic loop | Usually the same; a few tutorials use it for a slightly different method |
| MR or MC | Pattern abbreviations for magic ring or magic circle |
When Should You Use a Magic Ring?
Use a magic ring when you want a tight, neat center. It works well for:
- Amigurumi toys and animals, like the orange tabby cat and the Nordic Santa bear
- Hats and beanies, like the mesh bucket hat and the Santa hat
- Coasters, rugs and bags, like the Christmas tree coaster
- Flat circles and granny circles, once you know how to increase in a crochet circle
- Flowers, stars and appliqués, like the Silmë star ornament
What You Need
- Yarn: smooth, light-colored worsted weight yarn is easiest for learning.
- Hook: 5 mm or larger helps you see what you’re doing. New to hooks? See how to hold a crochet hook.
- Yarn needle: to secure the tail.
- Stitch marker: to mark the start of each round.
Free tools for this project
Check your hook and yarn before you start
Use the Hook Size Converter to switch between mm, US and UK hook sizes, and the Yarn Estimator to work out how much yarn your hat, toy or rug will need from a small swatch. Open the crochet calculator tools →
How to Make a Magic Ring in Crochet (Step by Step)
These steps are for right-handed crocheters. Left-handed steps are further down.
Method 1: The classic finger-wrap method
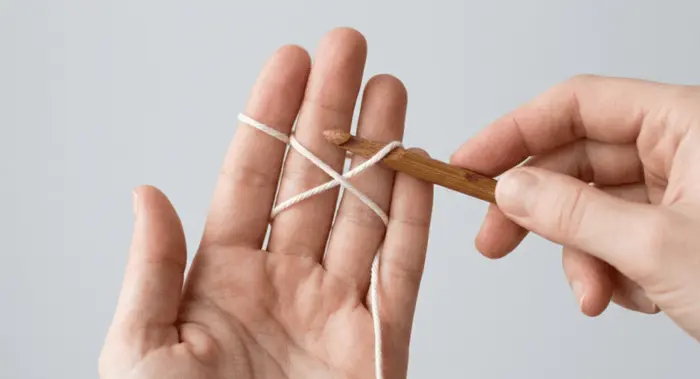
Step 1: Leave a tail and wrap the yarn. Leave a tail of about 5 to 6 inches (more with bulky yarn). Wrap the yarn around your index and middle fingers twice so the strands cross in front like an X.
Step 2: Pull a loop through. Insert your hook under the first strand, the one nearest your fingertips, and catch the second strand. Pull it back under the first strand to get a loop on your hook.
Step 3: Chain 1 to lock the ring. Yarn over with the working yarn, the strand going to your ball, and pull it through the loop on your hook. This chain locks the ring and doesn’t count as a stitch. Slide the ring off your fingers carefully.
Step 4: Stitch into the ring. Insert your hook into the center, going under both the ring and the tail. Make your first stitch, then repeat until you have the number your pattern asks for.
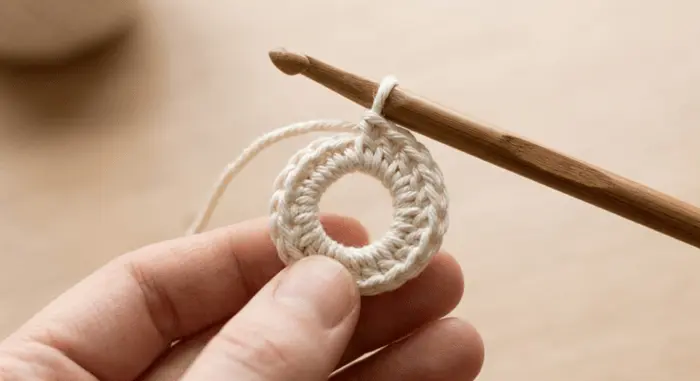
Step 5: Pull the tail to close. Gently tug the tail and the ring. One strand will move and the center will begin to close. Pull that strand first, then pull the tail to close it fully.
Method 2: The easier slip knot method
If the finger wrap feels fiddly, try this.
- Make a slip knot, but don’t tighten it. Leave the loop open.
- Put your hook through the loop and pull up a loop of working yarn. This is your chain.
- Insert your hook back into the big loop, trapping the tail, and make your first stitch.
- Keep stitching into the loop until you have enough stitches.
- Pull the tail to close it.
Both methods give the same result. Pick the one that feels easier.
How to Crochet a Magic Circle: How Many Stitches to Use
Short answer: Start with 6 single crochet, or about 8 to 12 stitches for taller stitches.
Starting stitches and chains by stitch type
| Round 1 stitch | Chain to start | Typical stitches in the ring |
|---|---|---|
| Single crochet (sc) | 1 | 6 (up to 8 for a bigger circle) |
| Half double crochet (hdc) | 2 | 8 to 9 |
| Double crochet (dc) | 2 or 3 | 10 to 12 |
Patterns differ, so these are typical starting points. Always follow your pattern. Making a hat, coaster or rug that has to fit? Crochet a small swatch and let the Gauge Calculator turn it into the stitches and rounds you need.
If you put too few stitches into a large ring, it can loosen. Use more stitches, or a smaller loop.
What happens in round 2?
For a flat circle, round 2 usually doubles the stitches. For example, 6 sc becomes 12 by working 2 sc in each stitch. Later rounds add a few more stitches each time. For a full stitch chart, see how to increase in a crochet circle.
How to read a pattern that uses a magic ring
If a pattern says “MR, ch 1, 6 sc in MR”, work it as written. If it starts with “ch 2, 6 sc in 2nd chain from hook”, you can replace that with:
Make a magic ring, ch 1, 6 sc in the magic ring.
You get the same number of stitches with a tighter center. Not sure what MR, ch or sc mean? How to read crochet patterns explains every abbreviation.
How to Close a Magic Ring Tightly (and Secure the Tail)
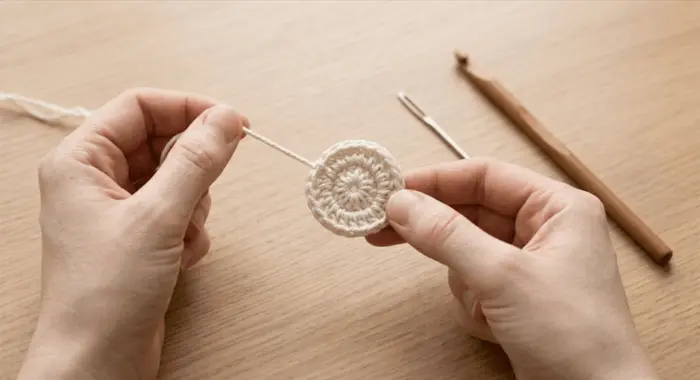
Closing is easy. Securing it keeps it closed.
- Pull the tail until the center is closed.
- Crochet over the tail for the first couple of stitches of round 2 if you like, to hold it in place.
- Thread the tail onto a yarn needle.
- Weave it through the base of the first-round stitches, around the center, and back in the other direction 3 or 4 times.
- Trim the tail once it feels firm.
Don’t cut the tail short before you’ve secured it. It’s what holds the ring shut.
Which Yarn Works Best?
| Yarn type | How it behaves | Tip |
|---|---|---|
| Smooth worsted | Easiest to see and work | Best for learning |
| Light color | Stitches are easy to see | Choose over dark yarn |
| Fuzzy or mohair | Hard to see where to insert | Make the ring in smooth yarn of a similar color, then switch |
| Chenille or velvet | Can catch and stick | Use a chain ring instead, or practice with smooth yarn |
| Bulky yarn | Bigger loop and tail | Leave a longer tail |
Still choosing? Our guide to the best yarn for crochet projects compares fibers, weights and colors, so you can pick a yarn that makes your first magic ring easy.
Common Mistakes and Fixes
| Problem | Why it happens | Fix |
|---|---|---|
| The ring won’t close | You’re pulling the wrong strand | Tug both strands and pull the one that moves |
| The ring opens later | The tail isn’t secured | Crochet over the tail, then weave it in both directions |
| A hole stays in the center | Not pulled tight enough | Pull the tail again after round 2 |
| The first stitch is hard to work into | You made it too tight | Loosen it with a yarn needle |
| The first stitch disappears | The ring wasn’t locked | Chain 1 before your first stitch |
| Stitches look bunched or gappy | They’re not spread evenly | Slide stitches around the ring as you work |
| You can’t see what you’re doing | Fuzzy, dark or thin yarn | Practice with smooth, bright yarn and a 5 mm or larger hook |
| The tail is too short | You didn’t leave enough | Leave 5 to 6 inches, more for bulky yarn |
Magic Ring vs Chain Ring: Which Should You Use?
| Magic ring | Chain ring | |
|---|---|---|
| Center | Tight, no hole | Small hole remains |
| Adjustable | Yes | No |
| Difficulty | Medium | Easy |
| Risk | Can loosen if not secured | Very stable |
| Best for | Amigurumi, hats, tight centers | Beginners, rugs, chenille yarn |
A chain ring is made by chaining a few stitches and joining them with a slip stitch. It can’t be tightened afterwards, so choose the stitch count that gives you the size you want.
Left-Handed Magic Ring
The steps are the same, only mirrored. Hold your hook in your left hand and the yarn in your right. A mirror or a left-handed video can help you see the movements.
Frequently Asked Questions
Is a magic circle the same as a magic ring?
Yes. Magic circle, magic ring and adjustable ring all describe the same technique.
How do you make a magic circle in crochet?
Wrap the yarn around two fingers twice, pull a loop through with your hook, chain 1 to lock it, crochet into the ring over the tail and pull the tail to close.
What does MR mean in a crochet pattern?
MR stands for magic ring. MC often means magic circle. Both mean the same technique.
How many stitches go in a magic ring?
Most patterns use 6 single crochet. Taller stitches often use 8 to 12.
Why won’t my magic ring close?
You’re probably pulling the wrong strand. Tug both and pull the one that moves.
Does the chain in a magic ring count as a stitch?
The chain 1 that locks the ring doesn’t count as a stitch. For half double and double crochet, follow your pattern.
Why does my magic ring keep coming undone?
The tail isn’t secured. Weave it through the first-round stitches in both directions.
Is a magic ring the same as a magic loop?
Usually yes. Some tutorials use “magic loop” for a slightly different method, but the goal is the same.
Can I use a magic ring with chenille yarn?
It can be tricky because chenille catches. Try a chain ring instead.
Is a magic ring harder than a chain ring?
Slightly, but practice makes it easy. A chain ring is a good starting point.
Final Thoughts
The magic ring is a small trick that gives your work a neater start. Make the loop, chain 1, stitch into the ring and pull the tail tight, then secure it. Practice a few times with smooth, bright yarn, and it will soon feel natural.
Keep going
Practice your magic ring on a real project
- Mr. Grumbles Christmas monster – lots of small rounds to practice on
- Nordic star gnome – a cosy amigurumi gnome
- Spiral Christmas tree ornament – a quick hanging make
- Winter snow angel ornament – a small, beginner-friendly start
- Ghost witch amigurumi – a fun seasonal toy
- Amigurumi winged heart – a sweet gift idea
Ready to plan your first project? The Crochet Project Planner lets you note your yarn, hook size and deadline, then tick off each step.
Stitch counts and chain-ups are typical values, cross-checked against several published tutorials. Always follow your own pattern.